
This will guide you through the steps in adding or removing items from zones.
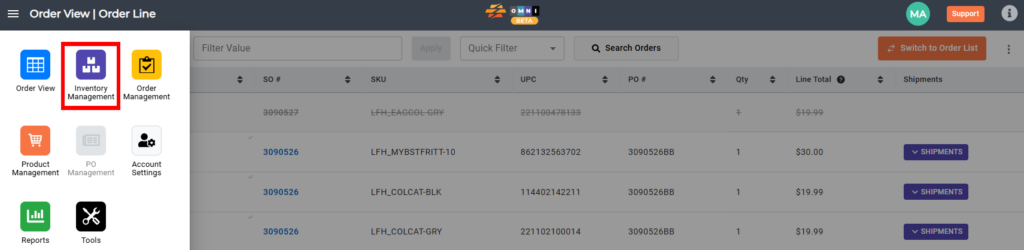
A) Selecting the “Inventory Management” tab
- Go to the main menu
- Select “Inventory Management”
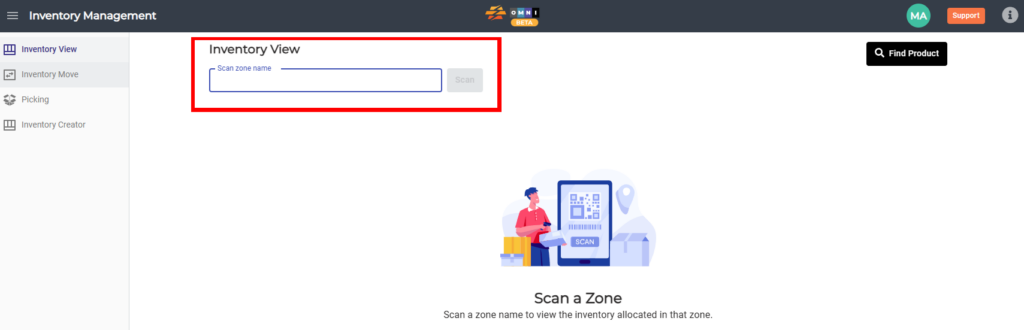
B) Open zone with a product for deleting
- Select the “Inventory View” submenu
- Enter the “Scan zone name” field
- Type zone name in combination form: number-letter-number example: “1A1” or “11AA22” for the zone you wish to queue up.
- Click the “Scan” button
C) Deleting product from zone
- Lock the zone by clicking on the open padlock button
- Select the products you want to delete from the zone by checking the box before the UPC
- Press the trash can button to delete products
- Finish by unlocking the zone (click the red locked padlock; this will allow others to access the zone)
