
The CommerceBlitz OMNI Tools module is a central hub designed to help you streamline your warehouse operations. This guide provides an overview of how to use these essential utilities to generate pick tickets, create inventory and UPC labels, and handle bulk shipping updates. By using these tools, you can automate repetitive tasks and ensure your warehouse data remains accurate and organized.
To access the Tools module, Open the OMNI Menu (three horizontal lines stacked on each other) and click on Tools.
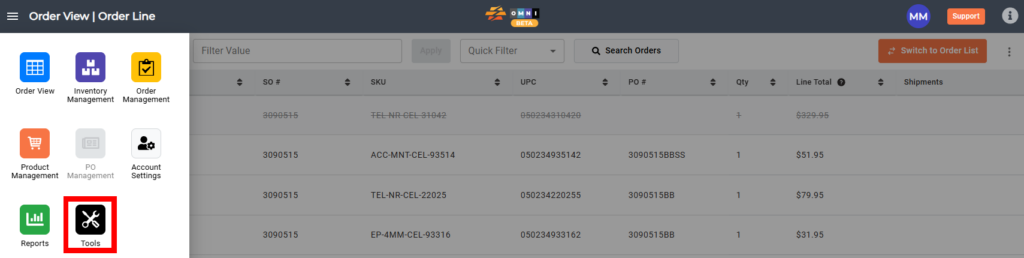
This will open up the Tools module, which defaults to the Pick Ticket Generator page. The sidebar menu for this module contains Pick Ticket Generator, Inventory Label Generator, and UPC Label Generator. As with the other modules, the sidebar can be collapsed for a larger viewing area.

Pick Ticket Generator:
- Enter the Sales Order Numbers (one per line) into the ‘Generate Pick Tickets‘ text box. Click the Green Generate button to generate the pick tickets. Click the Clear button to clear all the Sales Order Numbers from the text box. If more room is required to enter Sales Order Numbers, click and drag the right corner of the text box as needed.
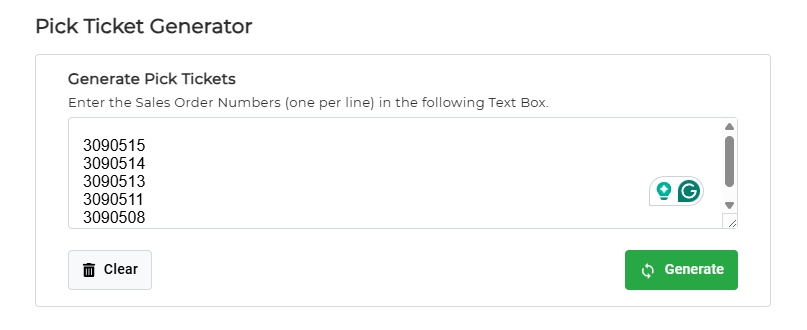
- After clicking the Generate button, a new browser page will appear with all the requested pick tickets. Multiple pick tickets will be viewable via the scroll bar on the right of this page. To print the pick tickets, simply click on the page and press ‘Ctrl-P’ on the keyboard or use the browser navigation menu and select Print.
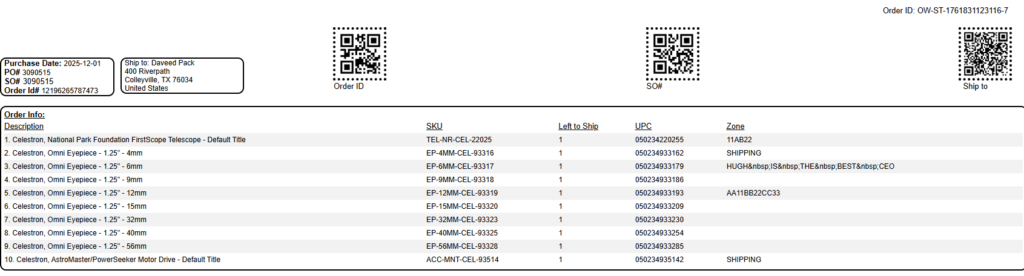
Note: In addition to showing the locations of where the items are to be pulled from in the warehouse, the pick ticket can also serve as a packing slip, and even a return form for the shipment.
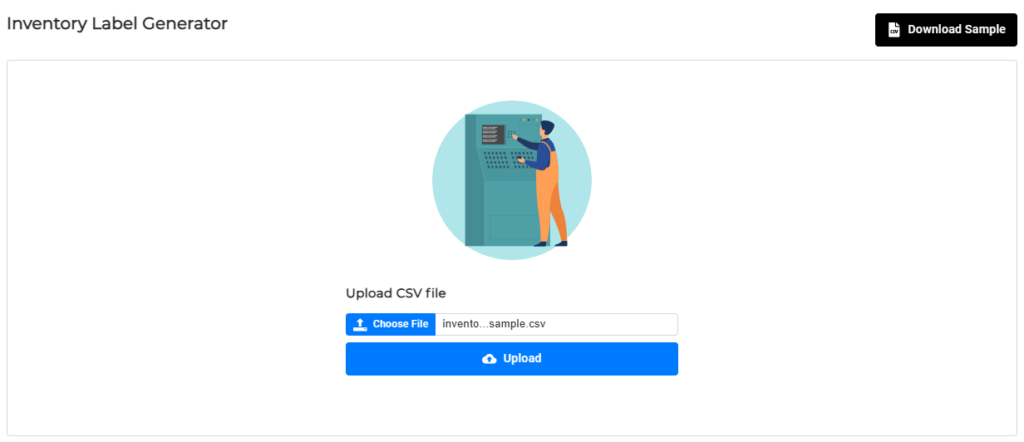
Inventory Label Generator:
- Select the Inventory Label Generator page from the Tools sidebar menu. This tool is used to generate QR code tags for Inventory Zones in the physical warehouse.

- Click the Download Sample button to generate a template of the file needed. The file to be uploaded must be in a *.csv format and contain the headers ‘zone’ and ‘format’ as listed in the sample.
- The ‘zone’ column is for the zone name, and the ‘format’ column is for the label type. Under the ‘format’ column enter ‘box’ for Box/Bin sized labels or ‘shelf’ for shelf-sized labels, depending on what size label is required.

- Click the Choose File button, select the correct file, and then click the Upload button.
- After the file has been submitted, a confirmation message will pop up on the upper right corner of the screen indicating “File successfully imported.”
- A file with the QR Codes will be in the ‘Downloads’ folder and you can use this to print from your printer.

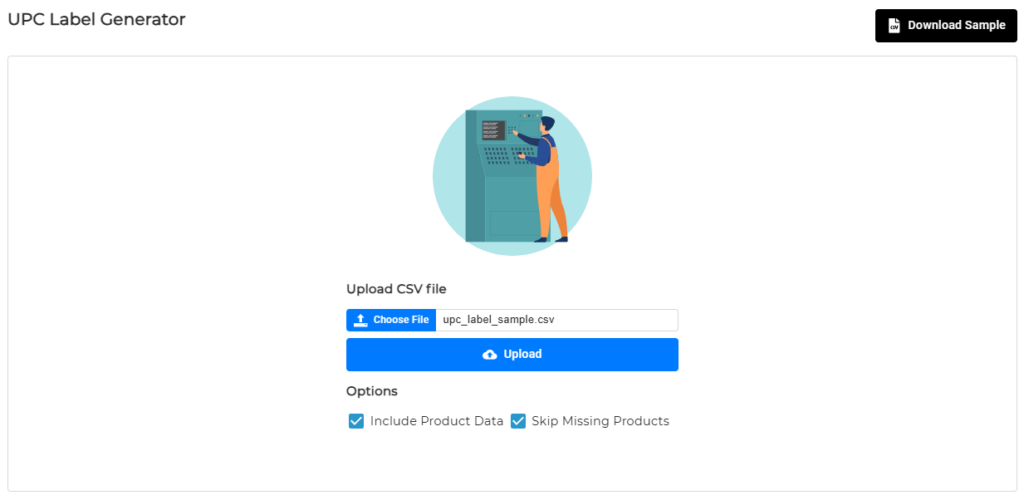
E) UPC Label Generator
- Select the UPC Label Generator page from the Tools Sidebar Menu. This tool is used to generate UPC labels to apply to products in the physical warehouse.
UPC Label Generator:

- Click the Download Sample button to generate a template of the file needed. The file to be uploaded must be in a CSV format and contain the header “upc” as listed in the sample. Type all the UPCs needed into the column and save the file.

- Click the Choose File button and select the correct file. Selecting ‘Include Product Data’ will include additional product details (Title, Brand, Size, SKU, etc) on the UPC label. Selecting ‘Skip Missing Products’ will mean that UPCs not currently stored in the OMNI database will be skipped and not generated. Click the Upload button. Select the desired options by clicking the checkboxes, then click the Upload button. In the example below the user has opted to include product data but also generate UPC labels for UPCs not currently stored in the OMNI database.
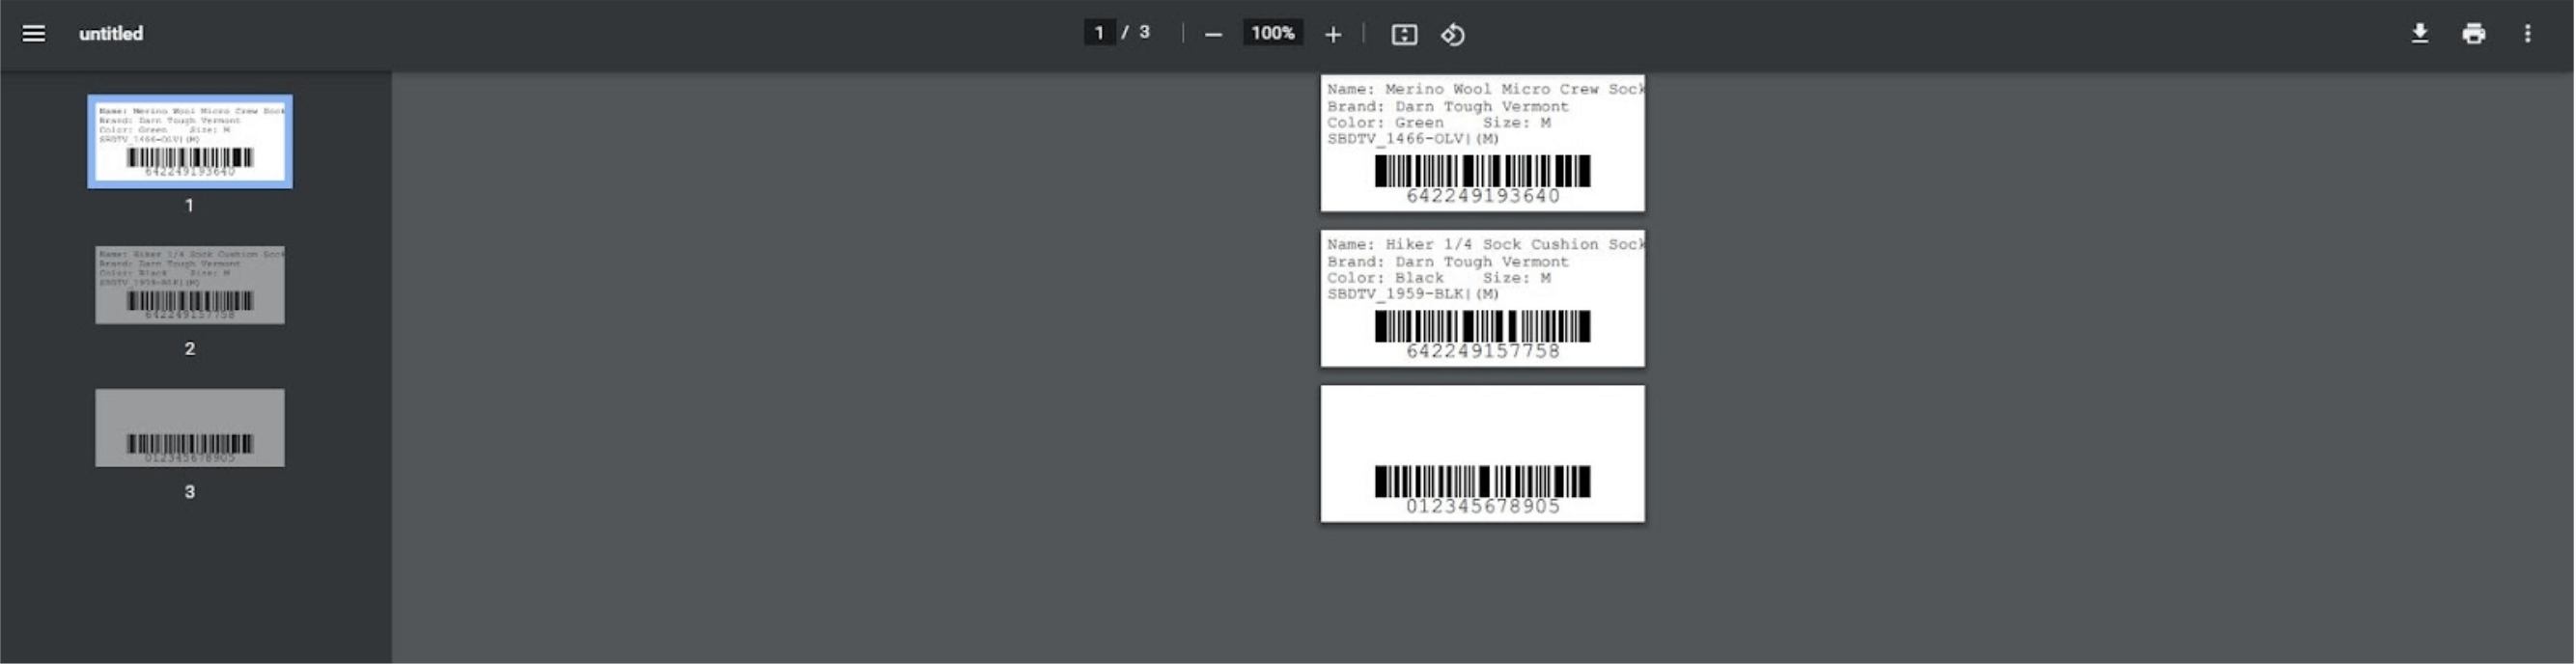
- After the file has been submitted, a confirmation message will pop up on the upper right corner of the screen indicating “File successfully imported.”
- A file with the UPC Codes will be in the ‘Downloads’ folder and you can use this to print from your printer. Note that the Product details printed for the UPCs that were stored in the OMNI database but the UPC that was not stored in the OMNI database generated only a UPC label, based on the selections the user made above.
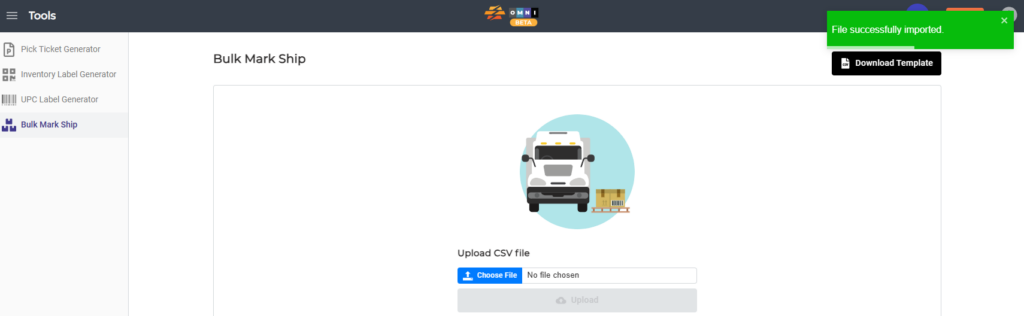
Bulk Mark Ship:
The Bulk Mark Ship tool is used to upload tracking information for one or more orders at once for any sales channel. Once tracking is uploaded, the tool pushes the tracking to its appropriate sales channel, and the order is marked as fulfilled. The upload is be done by uploading a CSV file.
- Select Bulk Mark Ship from the left side bar menu.

- Download the template with the Download Template button on the top right.

- Add your data to the downloaded template, following the headers provided. Save the file when completed.

- Now you are ready to upload the file back into CommerceBlitz OMNI, do so by selecting the CSV file on your machine and selecting upload.
- Click the Upload and Validate Input button and review the tracking upload information. – Step 5 – A successfully uploaded message will show.