
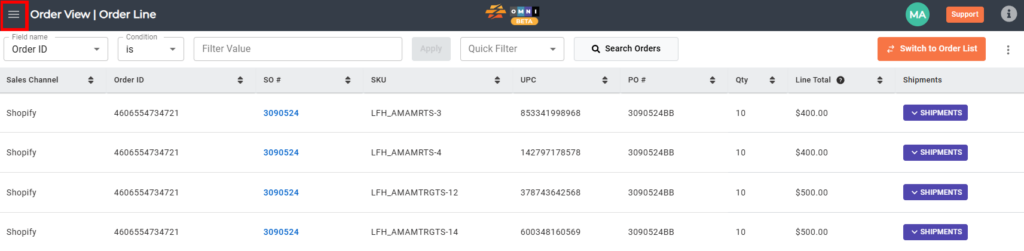
After submitting a username and password on the CommerceBlitz OMNI (OMNI) Login screen, the Order Line View page will open. As the name implies, this page allows the user to see all items ordered by line (or row) and it functions as the main hub for OMNI. There are many tools, filters, and functions that are accessible from this page. The following section provides detailed instructions on how to use these features.
A) Search Order
- To search for an order click the Search Orders button located in the center of the screen.

- The Search Box will open on the page. To cancel, click the X in the top right corner of the Search Box and exit back to the Order Line View.
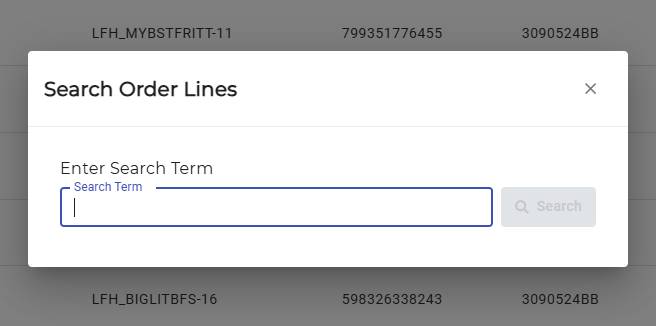
- To perform a search, type the information needed into the Search Term field and click the Search button.

- The Search Results will open and show all results found with the search term highlighted in yellow.
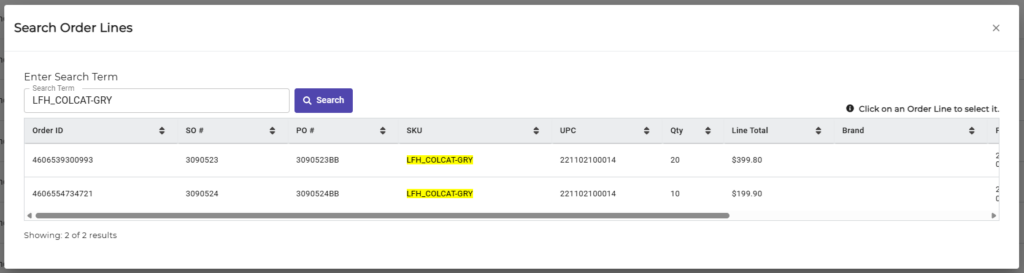
- To conduct another search, simply type the information needed into the Search Term field and click the Search button on this page. To exit the Search Results box, click the X on the top right of the box.
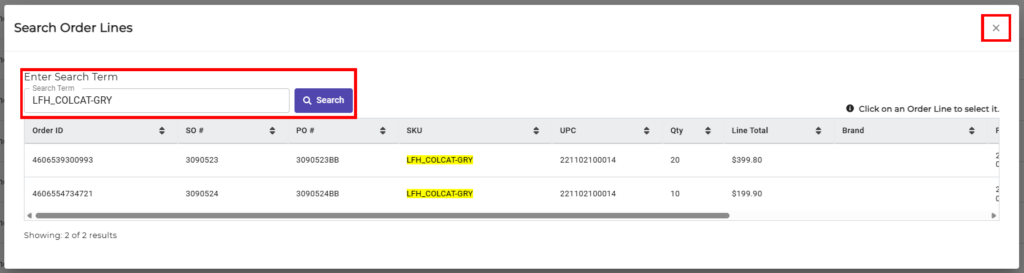
- To view one of the orders from the Search Results box, click on the order and then click the Apply Filter button that appears on the right side of the Search Results box.

- Only the order selected from the Search Results box will be displayed on the Order Line View page, as this is a filtered view. The filter can be seen in gold underneath the Filter Bar. More details on filters and how to use them is included later in this section regarding the Filter Bar.
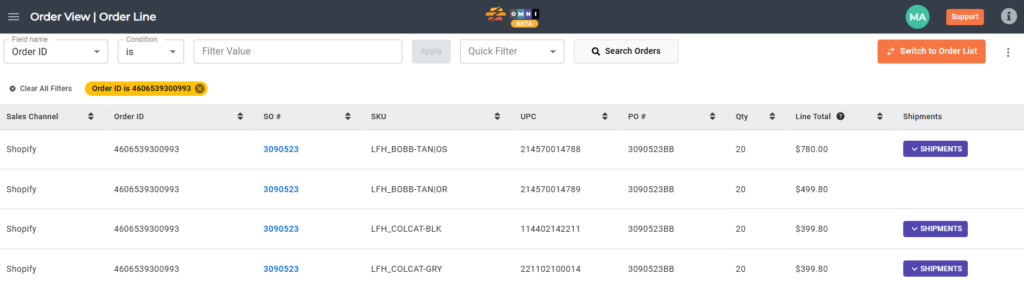
- To clear this search selection click the X on the filter or click the Clear All Filters button on the far left.
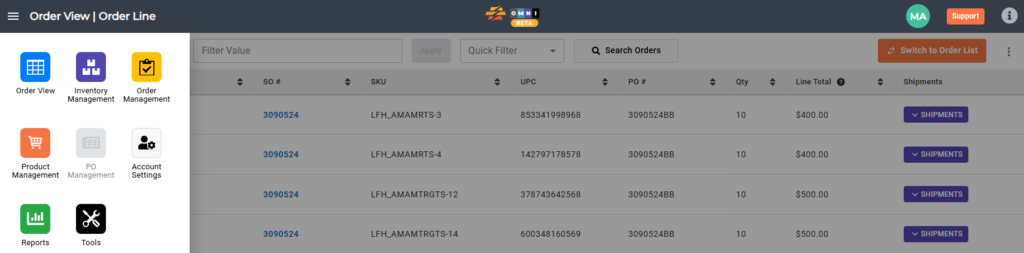
B) OMNI menu
- The OMNI Menu is located on the top left-hand side of the screen and is indicated by the icon of three horizontal lines stacked on top of one another.
- Click the OMNI Menu icon to view the slideout options. All OMNI pages can be accessed from this menu with a click on one of the available options such as Order Line View, Inventory Management, Order Management, Product Management, Reports, Tools, or Account Settings. To hide the OMNI Menu slideout click the icon again or click anywhere else on the page.
C) Sign Out Button
- To sign out click on the user avatar, located on the top right-hand side of the screen.
- Clicking on the avatar will display the Sign Out option. Selecting Sign Out will do as the name implies and sign the user out of OMNI.

- Note: Some users may be automatically logged off due to inactivity, depending on optional settings created by the account administrator.
D) Options Menu
- Directly below the avatar, on the top right-hand side of the screen, locate and click on the ellipsis menu button.

- This will open up options to refresh the screen, download the screen, or open the Options menu.

- After clicking to open the Options menu the user can select which fields to show on the page by checking or unchecking the boxes next to the fields. Note that all fields can be toggled on/off by checking the Toggle All button.
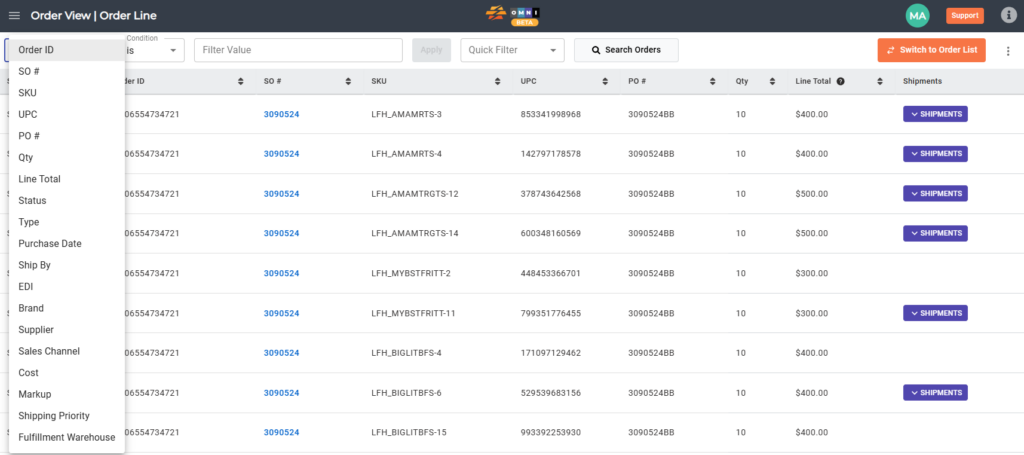
- To customize the order of the data fields on the screen, locate the 2 bars next to the field and click and drag the field to the desired position. In the example below the SKU field has been dragged from the fourth column slot to the second column slot, after the Order ID field.
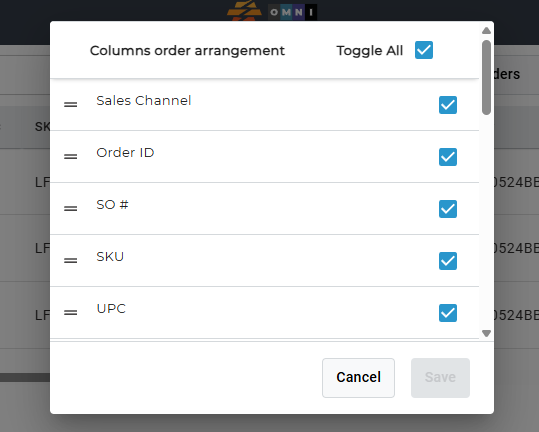
- Once all options have been customized, click the Save button on the bottom left corner of the options menu. Or if the selected changes are not wanted, click the Cancel button.
E) Filters
- The Filter Bar is located to the left of the Search Orders button and contains two drop-down menus, the Filter Value field, and the Quick Filter dropdown menu.

- The first drop-down menu allows for the selection of a Column field to filter by (such as Order ID, SO#, SKU, UPC, etc.)
- The second drop-down menu allows the user to define the relationship between the Column field and the Filter Value field by choosing from “is”, “is not”, “greater than”, “less than”, or “contains.”

- To use the Filter Bar functions, select a Column field from the first drop-down menu, select a relationship filter from the second drop-down menu, type a value in the Filter Value field, and click on the Apply button to the right of the Filter Value field.

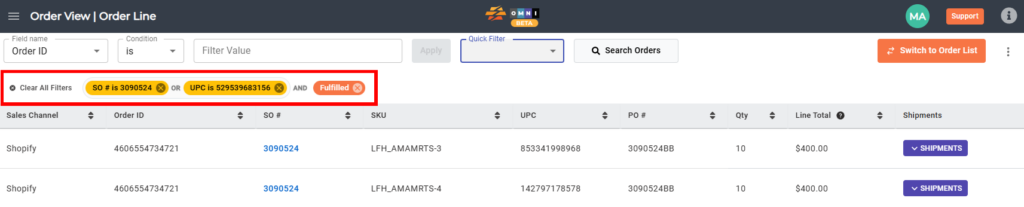
- The filter will appear in gold underneath the Filter Bar indicating how the current view is filtered.

- To add another filter, repeat the process and the second filter will appear next to the first filter, thus narrowing the results to orders that meet both “Filter 1” AND “Filter 2” parameters. This process can be repeated over and over to accommodate multiple filter parameters and a narrower result.

- To combine two or more filtering selections, click and drag one filter into the other. This will produce results for “Filter 1” OR “Filter 2”. The reverse action can also be done to separate the filters again.
- To remove a single filter, simply click the X on the filter. To remove and clear ALL filters, click the Clear All Filters button on the far left.
- The Quick Filter drop-down menu contains filters that relate to “Exported, Canceled, Prime, or Premium” orders. Select the appropriate filter from the drop-down menu to apply the filter.
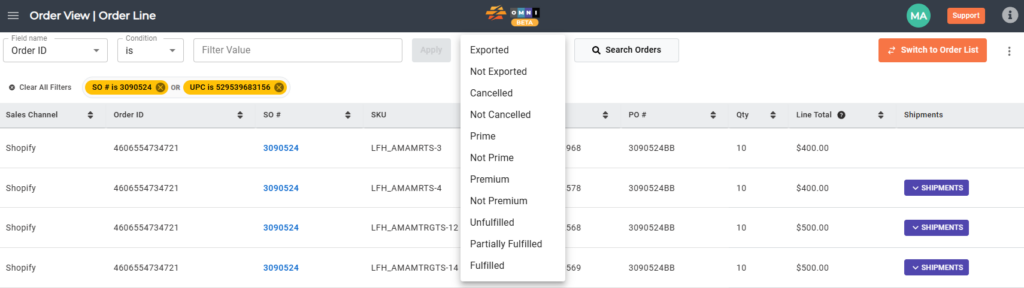
- The Quick Filter selected will appear under the Filter Bar in orange to differentiate it from other filters.
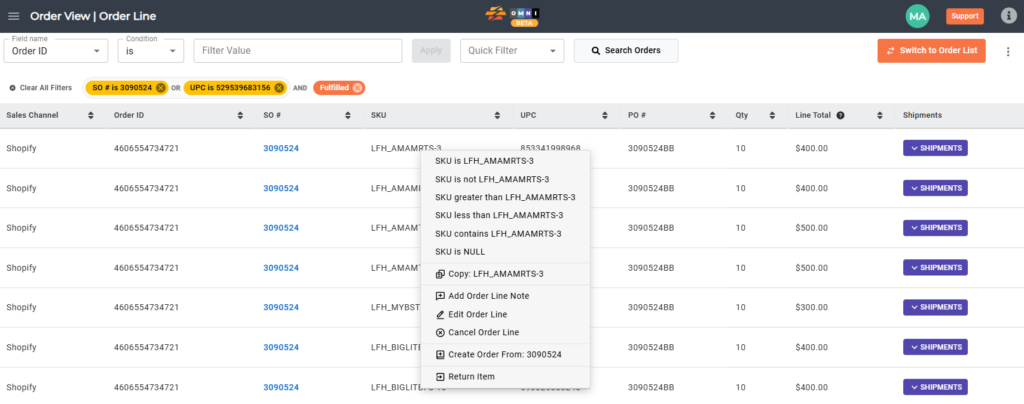
- Filter Shortcuts drop-down can be accessed with a right-click on the field of data to use as a Filter Value. Other shortcuts such as “Copy Field”, “Edit Order Line”, and “Create Order From SO” can also be accessed from here. In the example below, the user has right-clicked on the Price Column of SO# 7918452 and “$200.00” is the Filter Value. If the user had right-clicked on another field, that data would be shown as a selection option in the Filter Shortcuts drop-down.
- When a filter is selected it is added in gold, to the right of the last filter. As mentioned earlier, to remove any filter, simply click the X on the filter. To remove ALL filters, click the Clear All Filters button on the far left.
