A) Placeholder TBD
B) Placeholder TBD
C) Placeholder TBD

Sales Reports
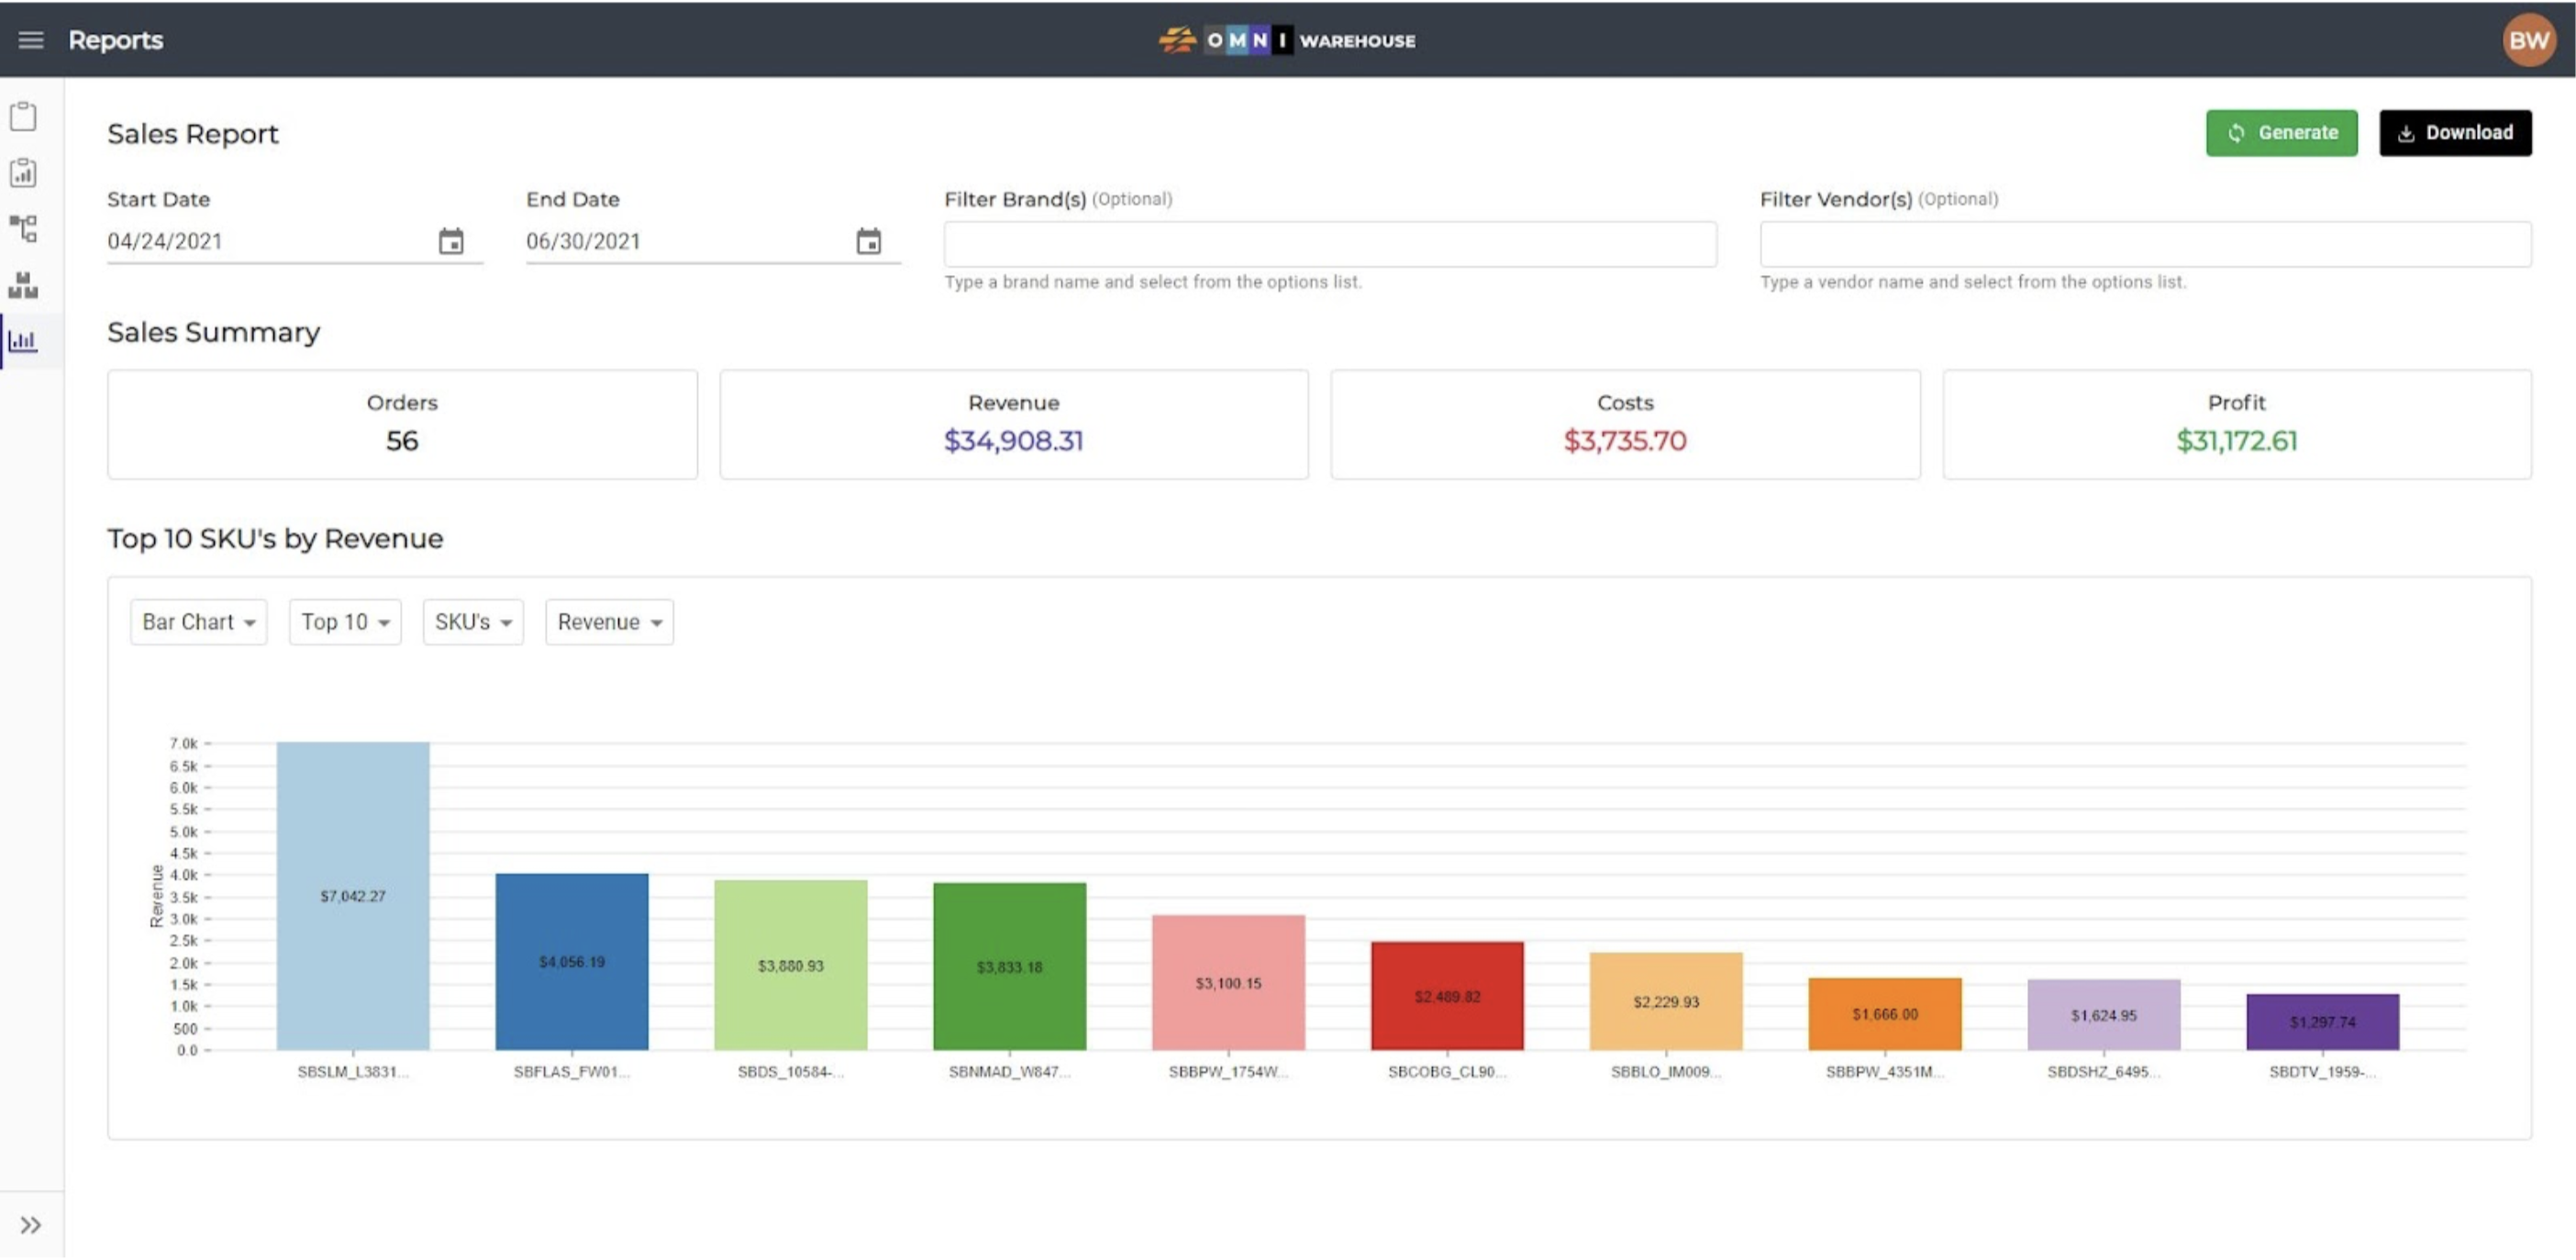
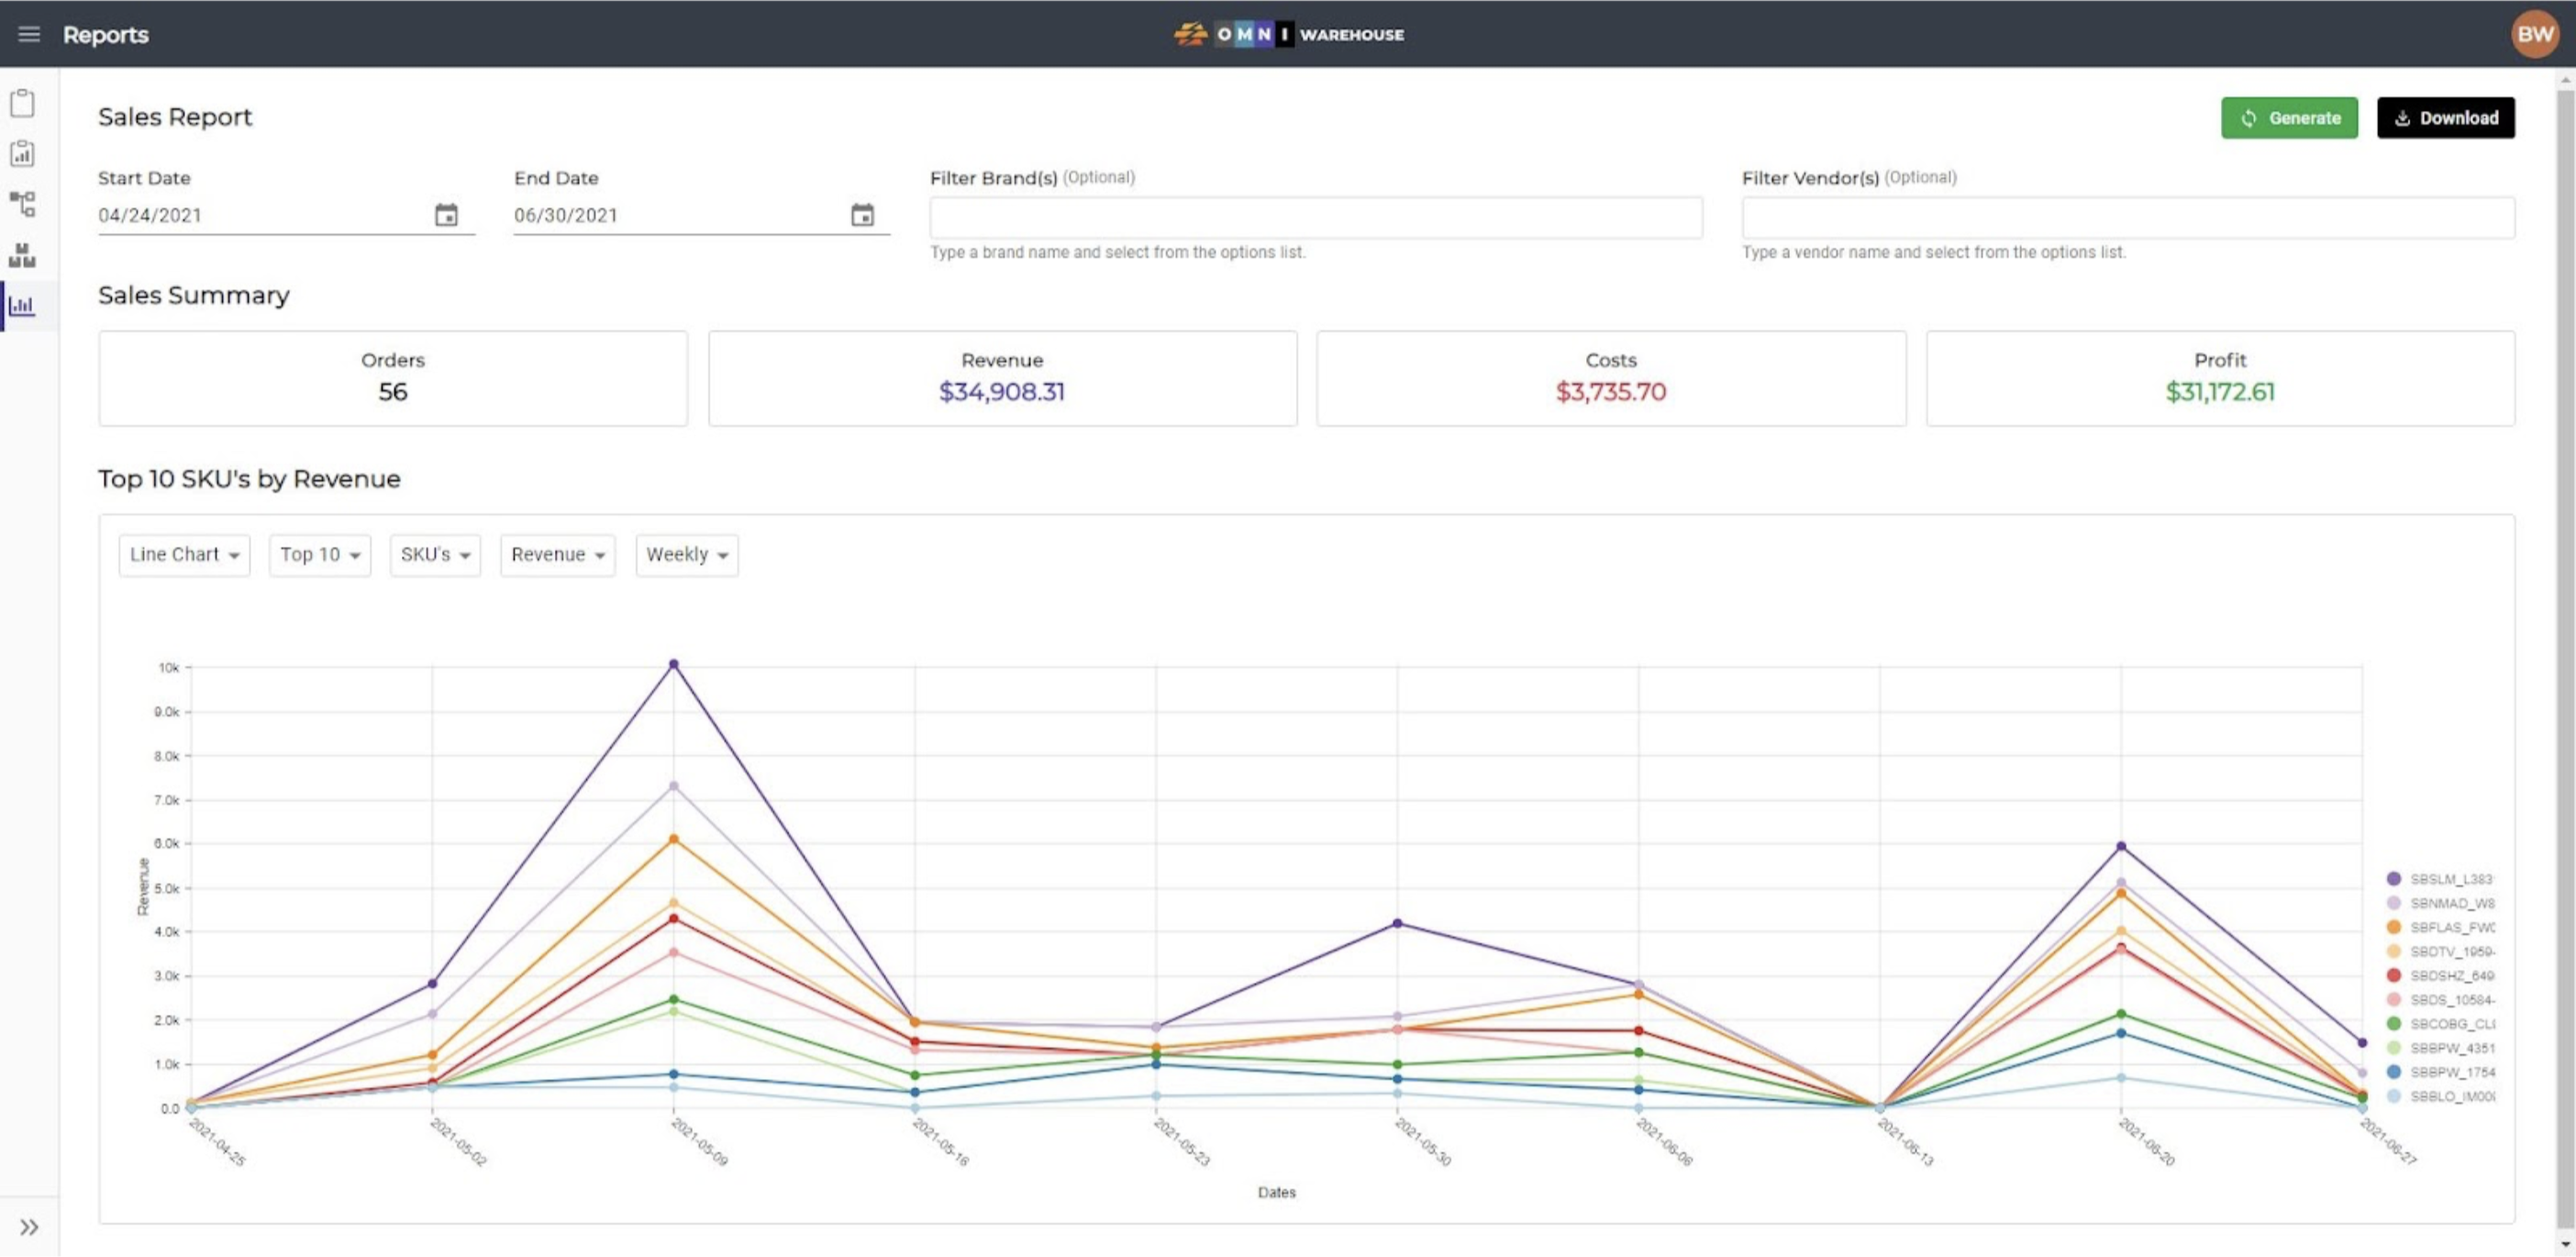
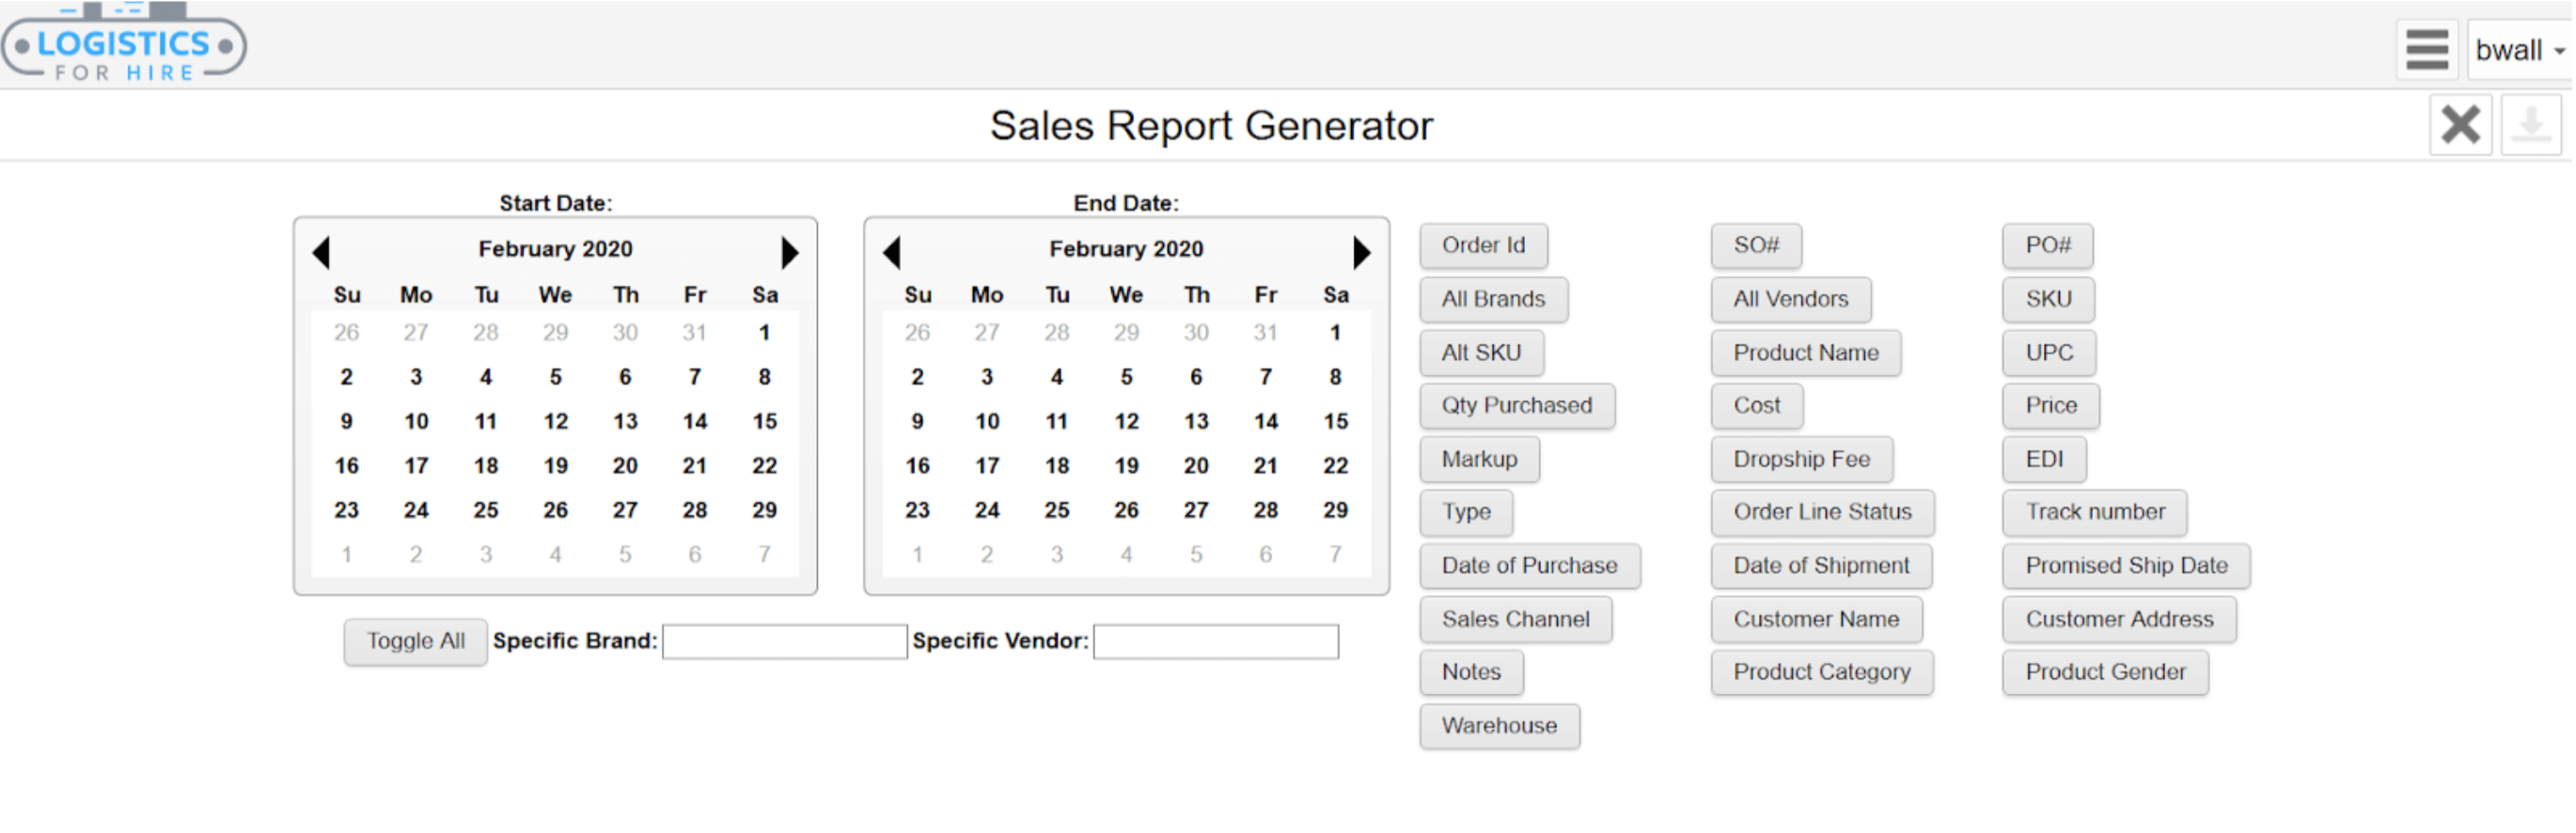
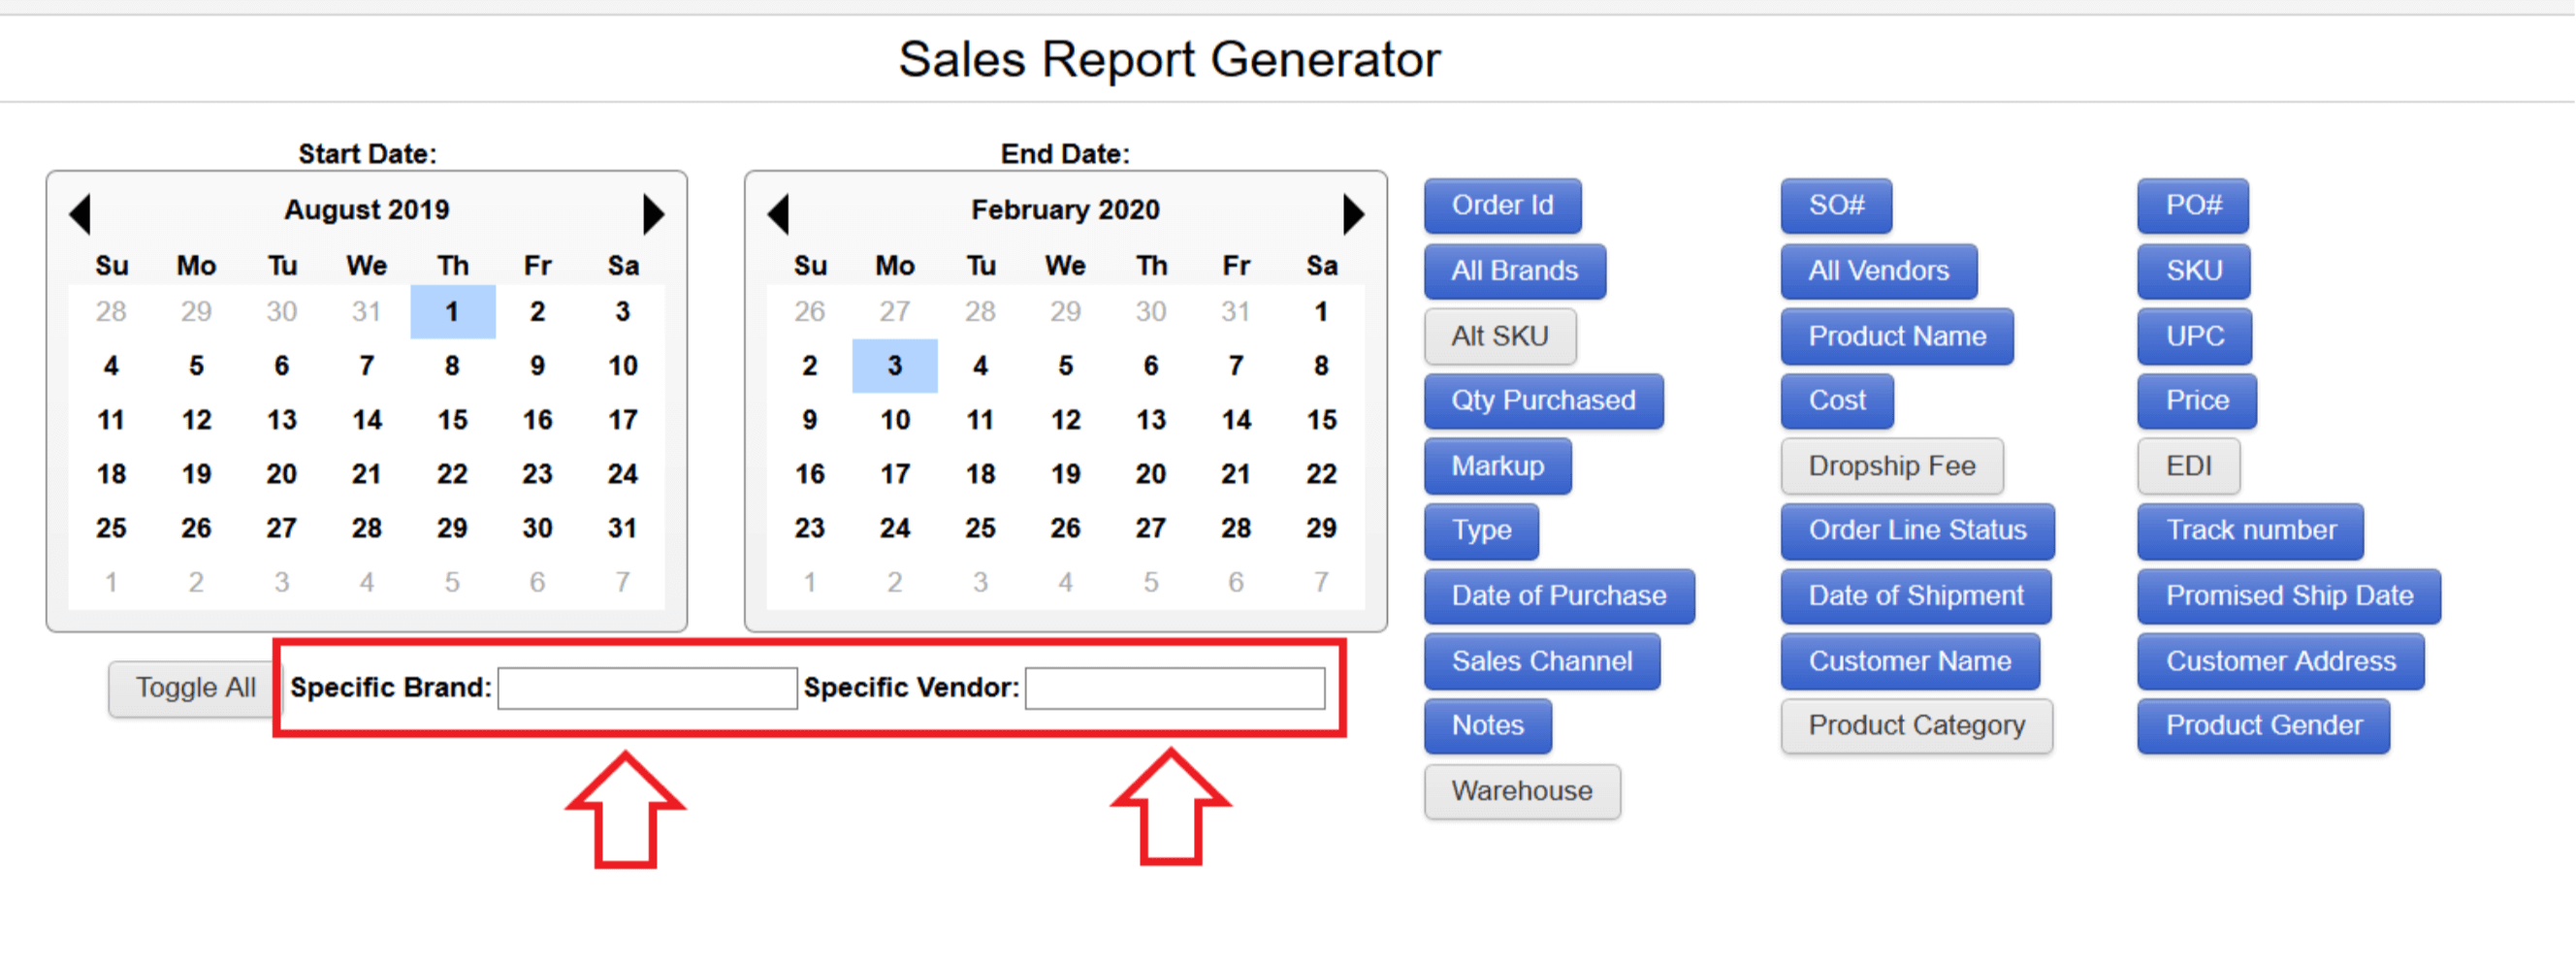
The Sales Report Generator page is used to generate sales reports in Commerce Blitz. Sales reports can be easily customized for specific time periods, brands, and vendors by selecting fields to be included or excluded from the report as needed.
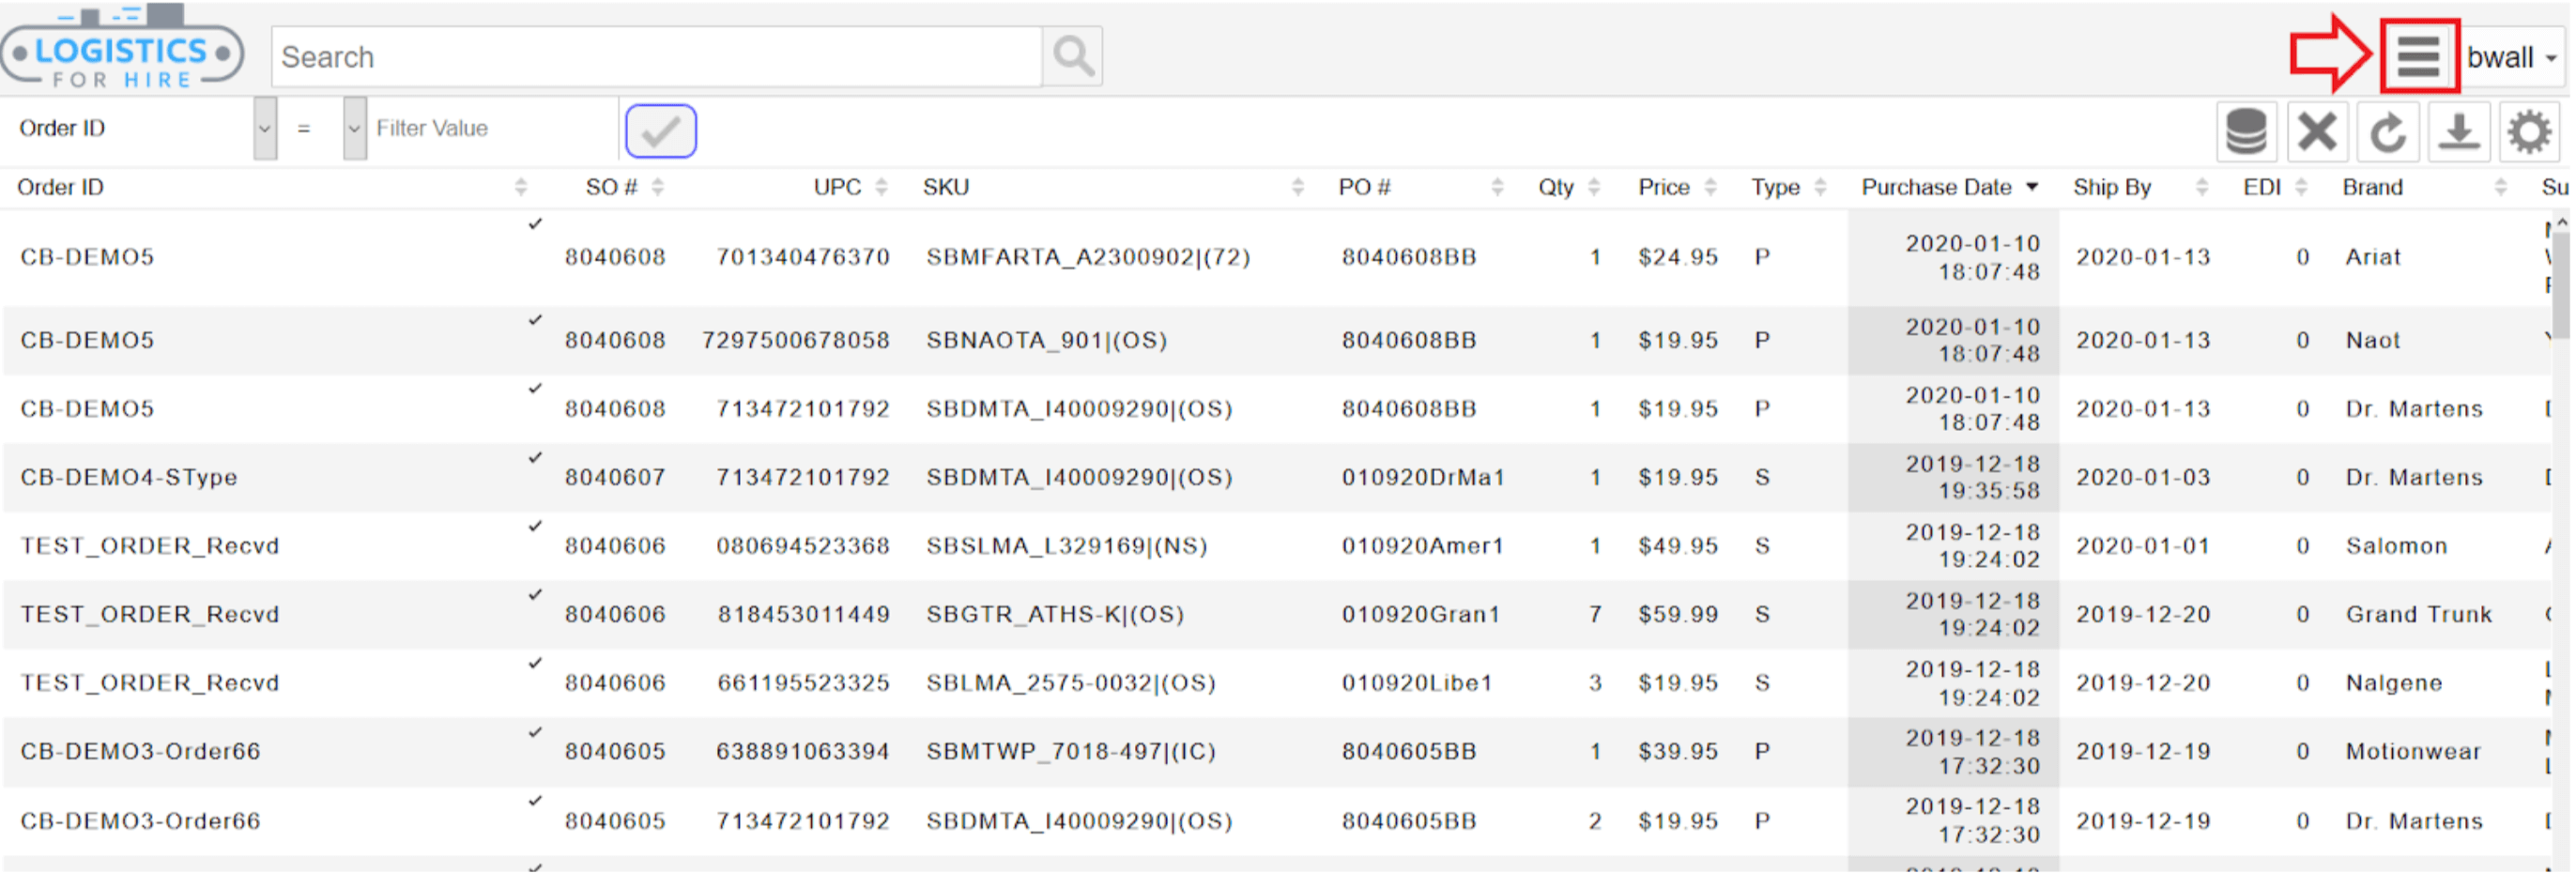
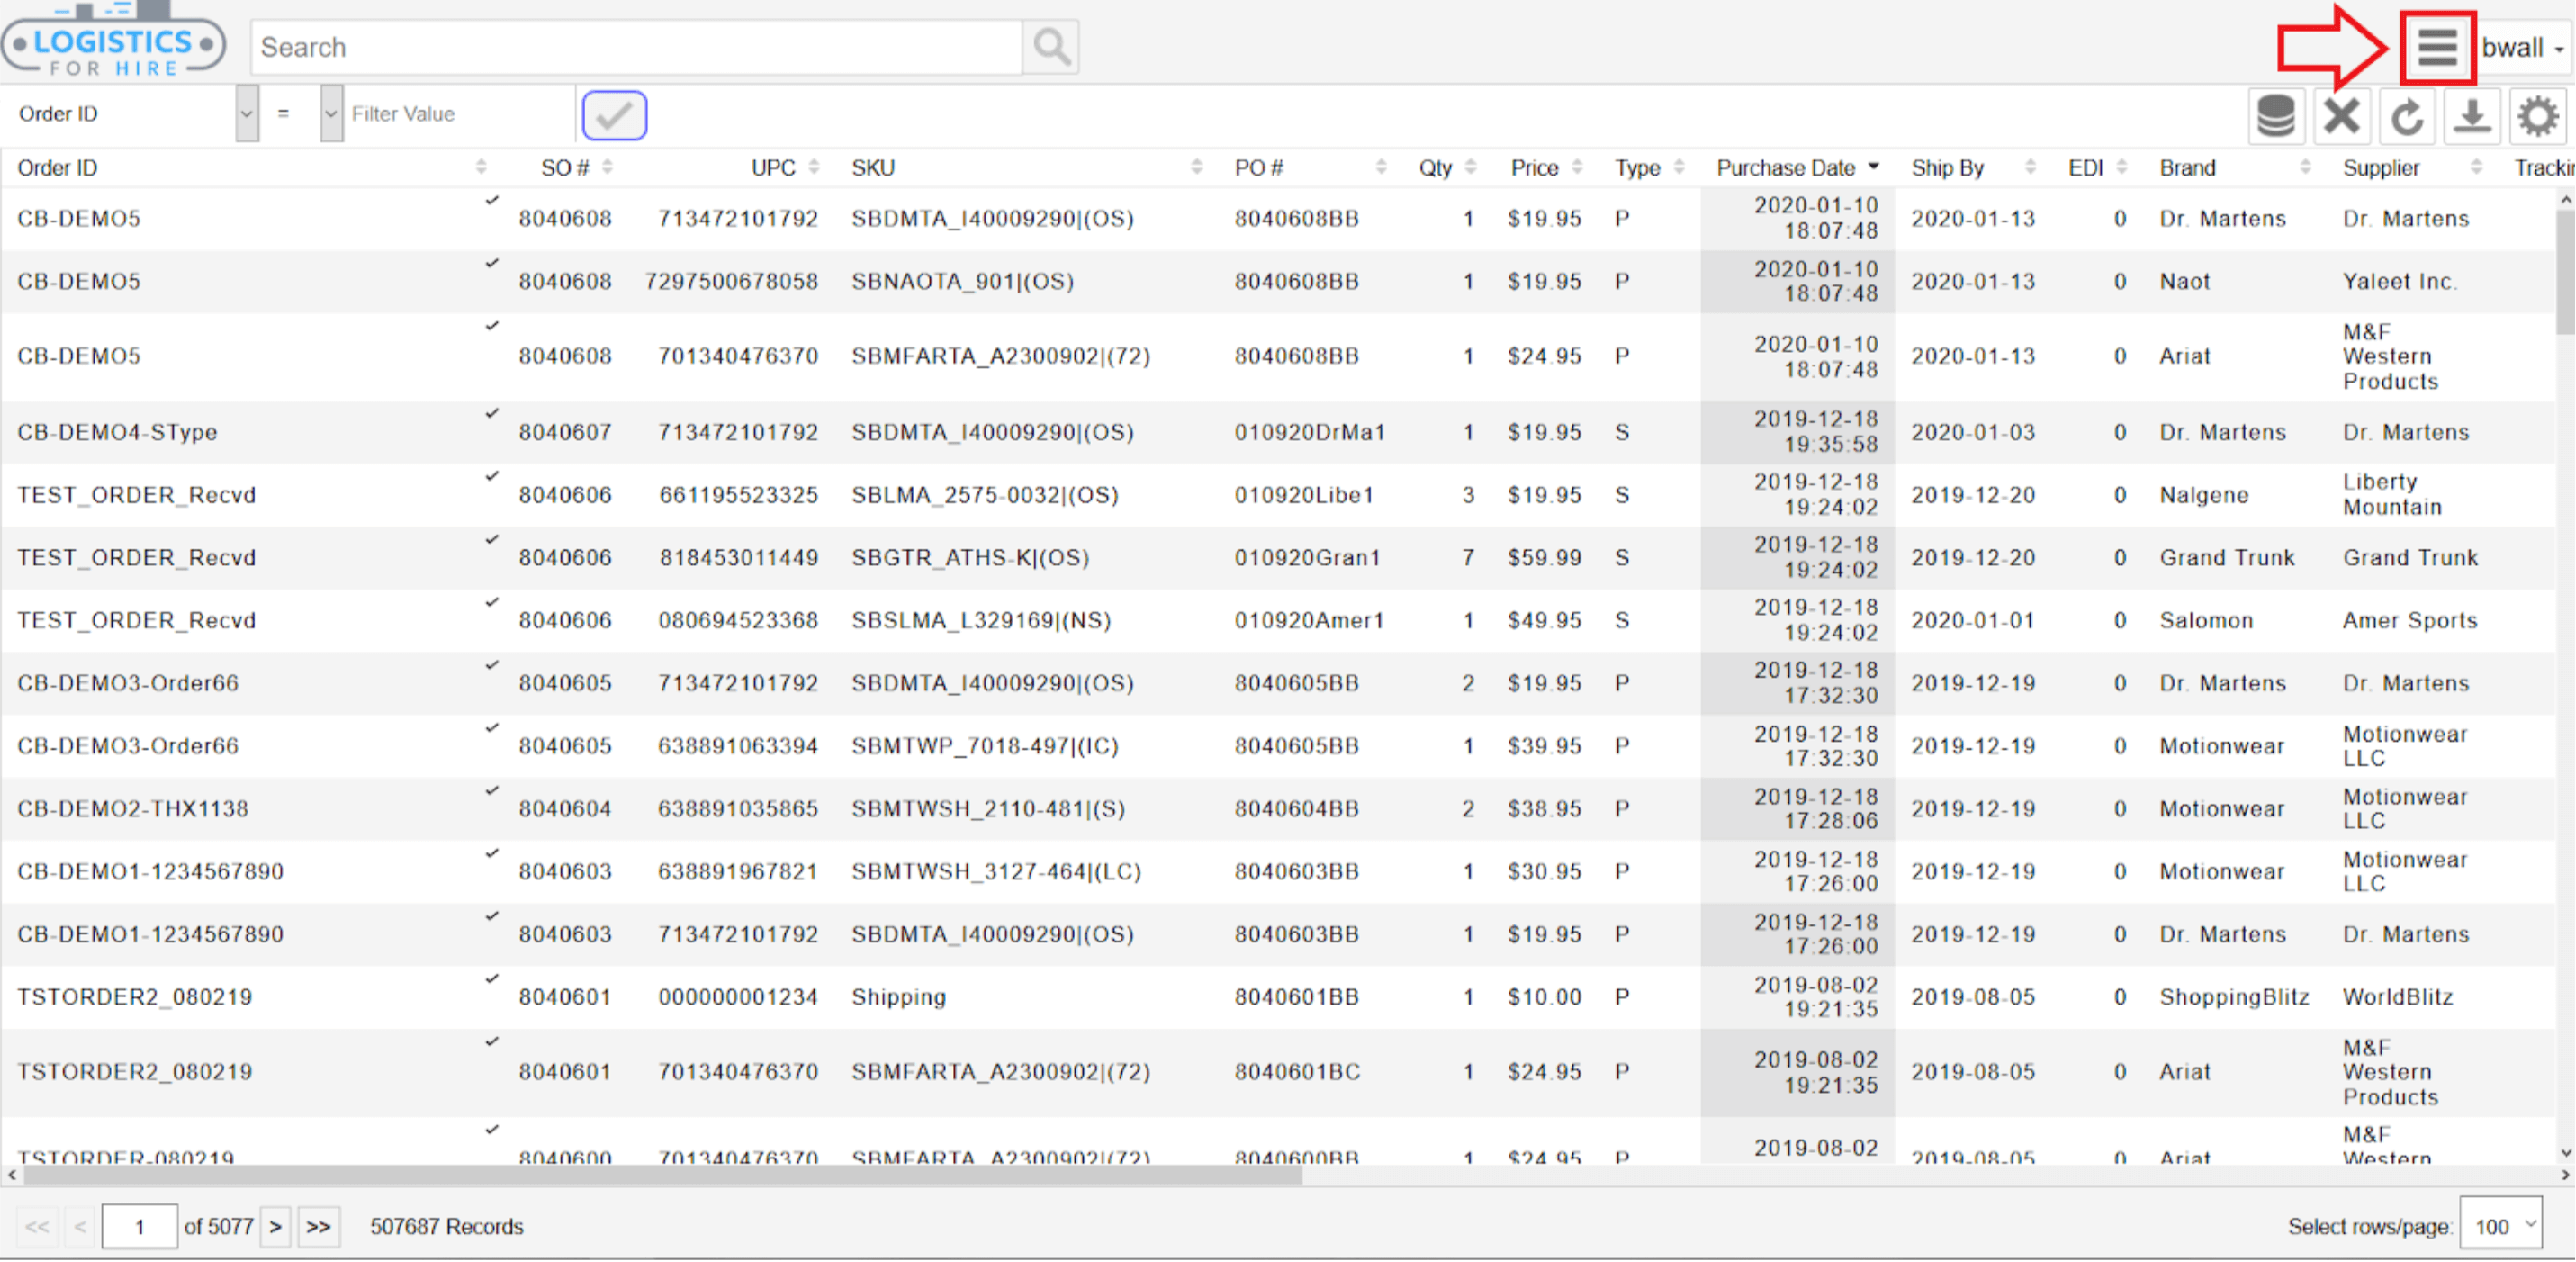
- Select Sales Reports from the CommerceBlitz Tools Menu (three horizontal lines stacked on top of one another).
- The page will open and show a “Start Date:” and “End Date:” calendar along with a series of toggle buttons for available fields to include in the report.
- Select a start and end date for the report by clicking on the appropriate calendar and dates.
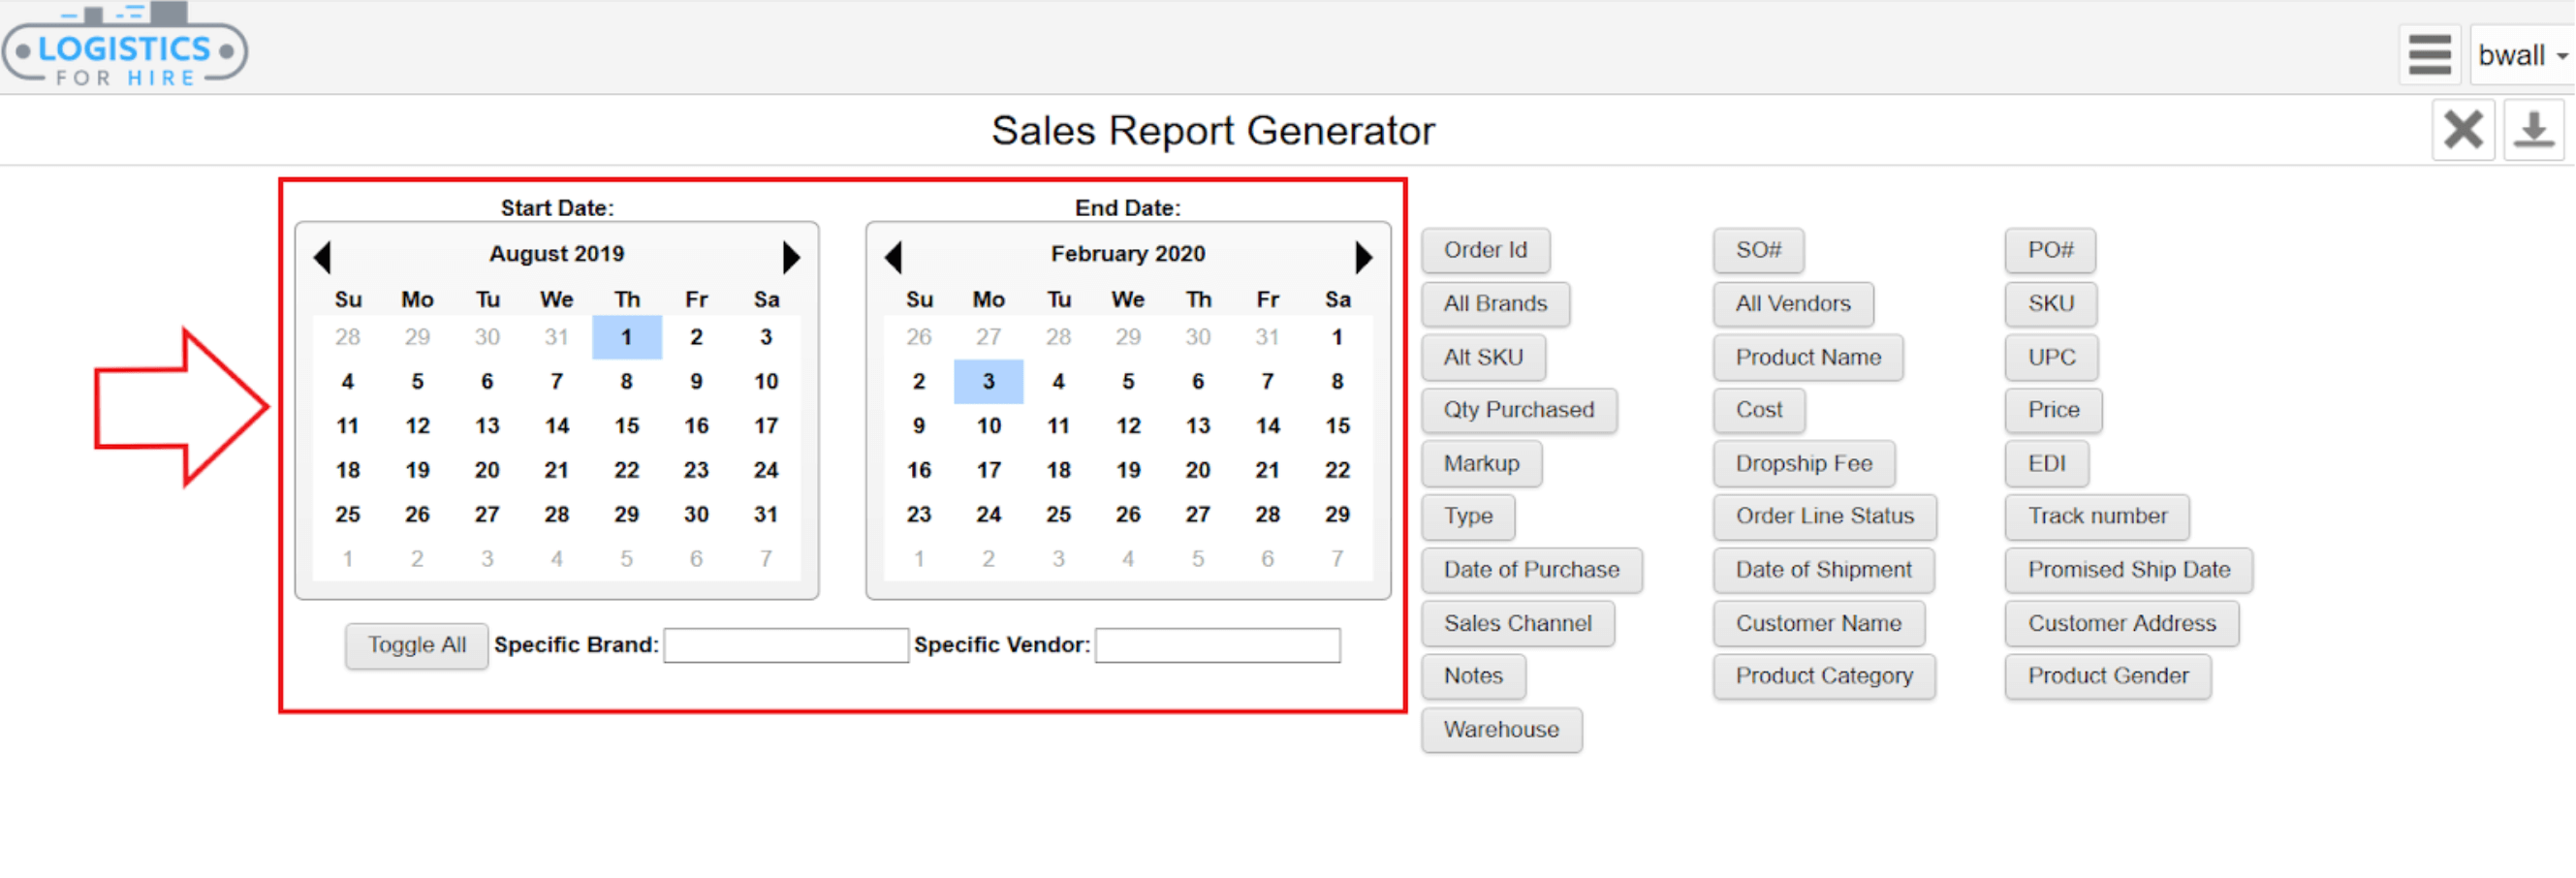
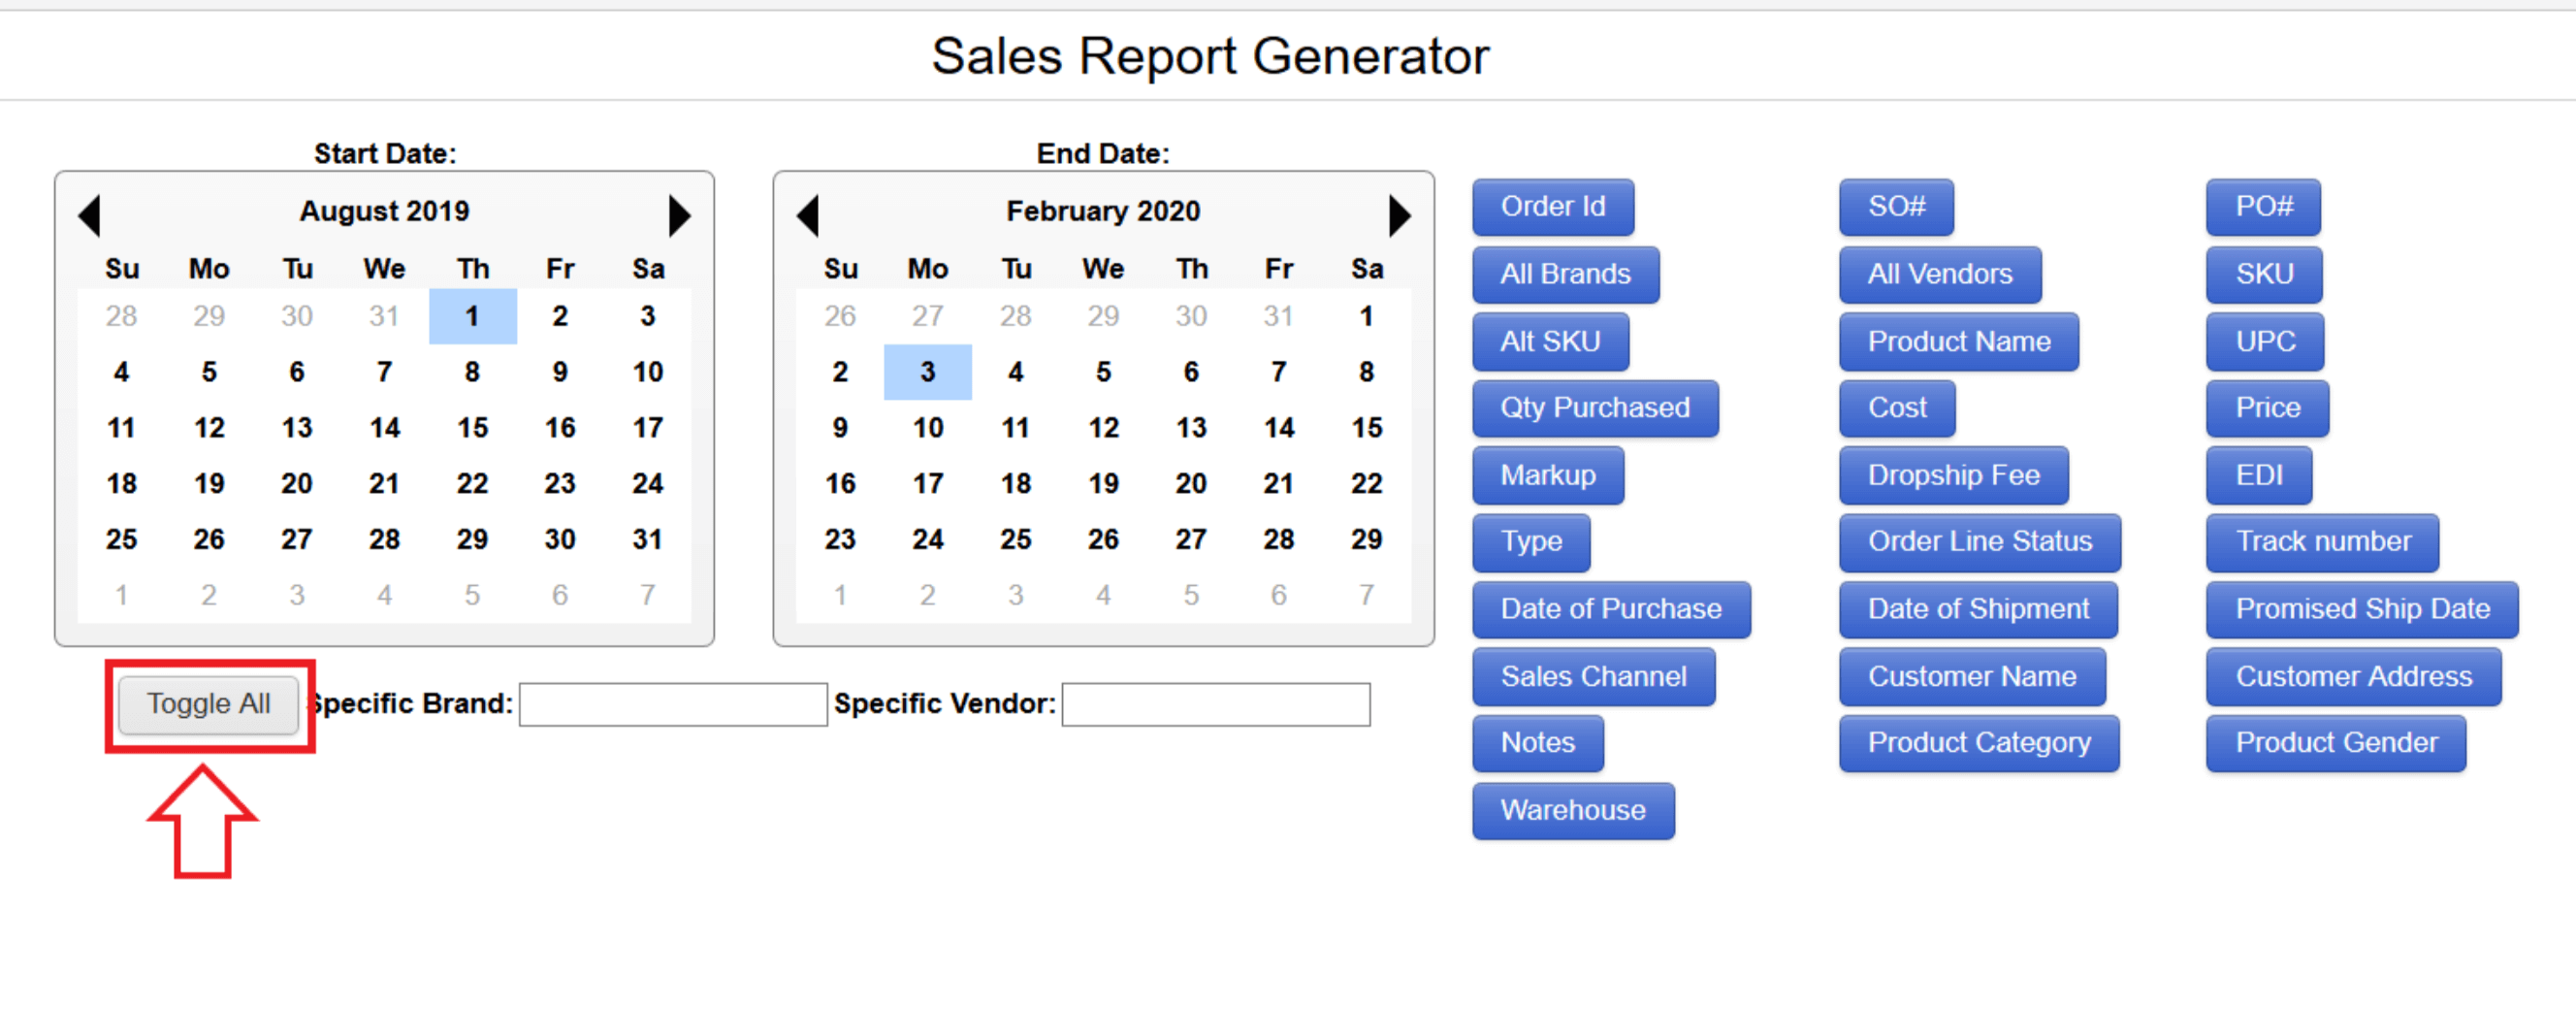
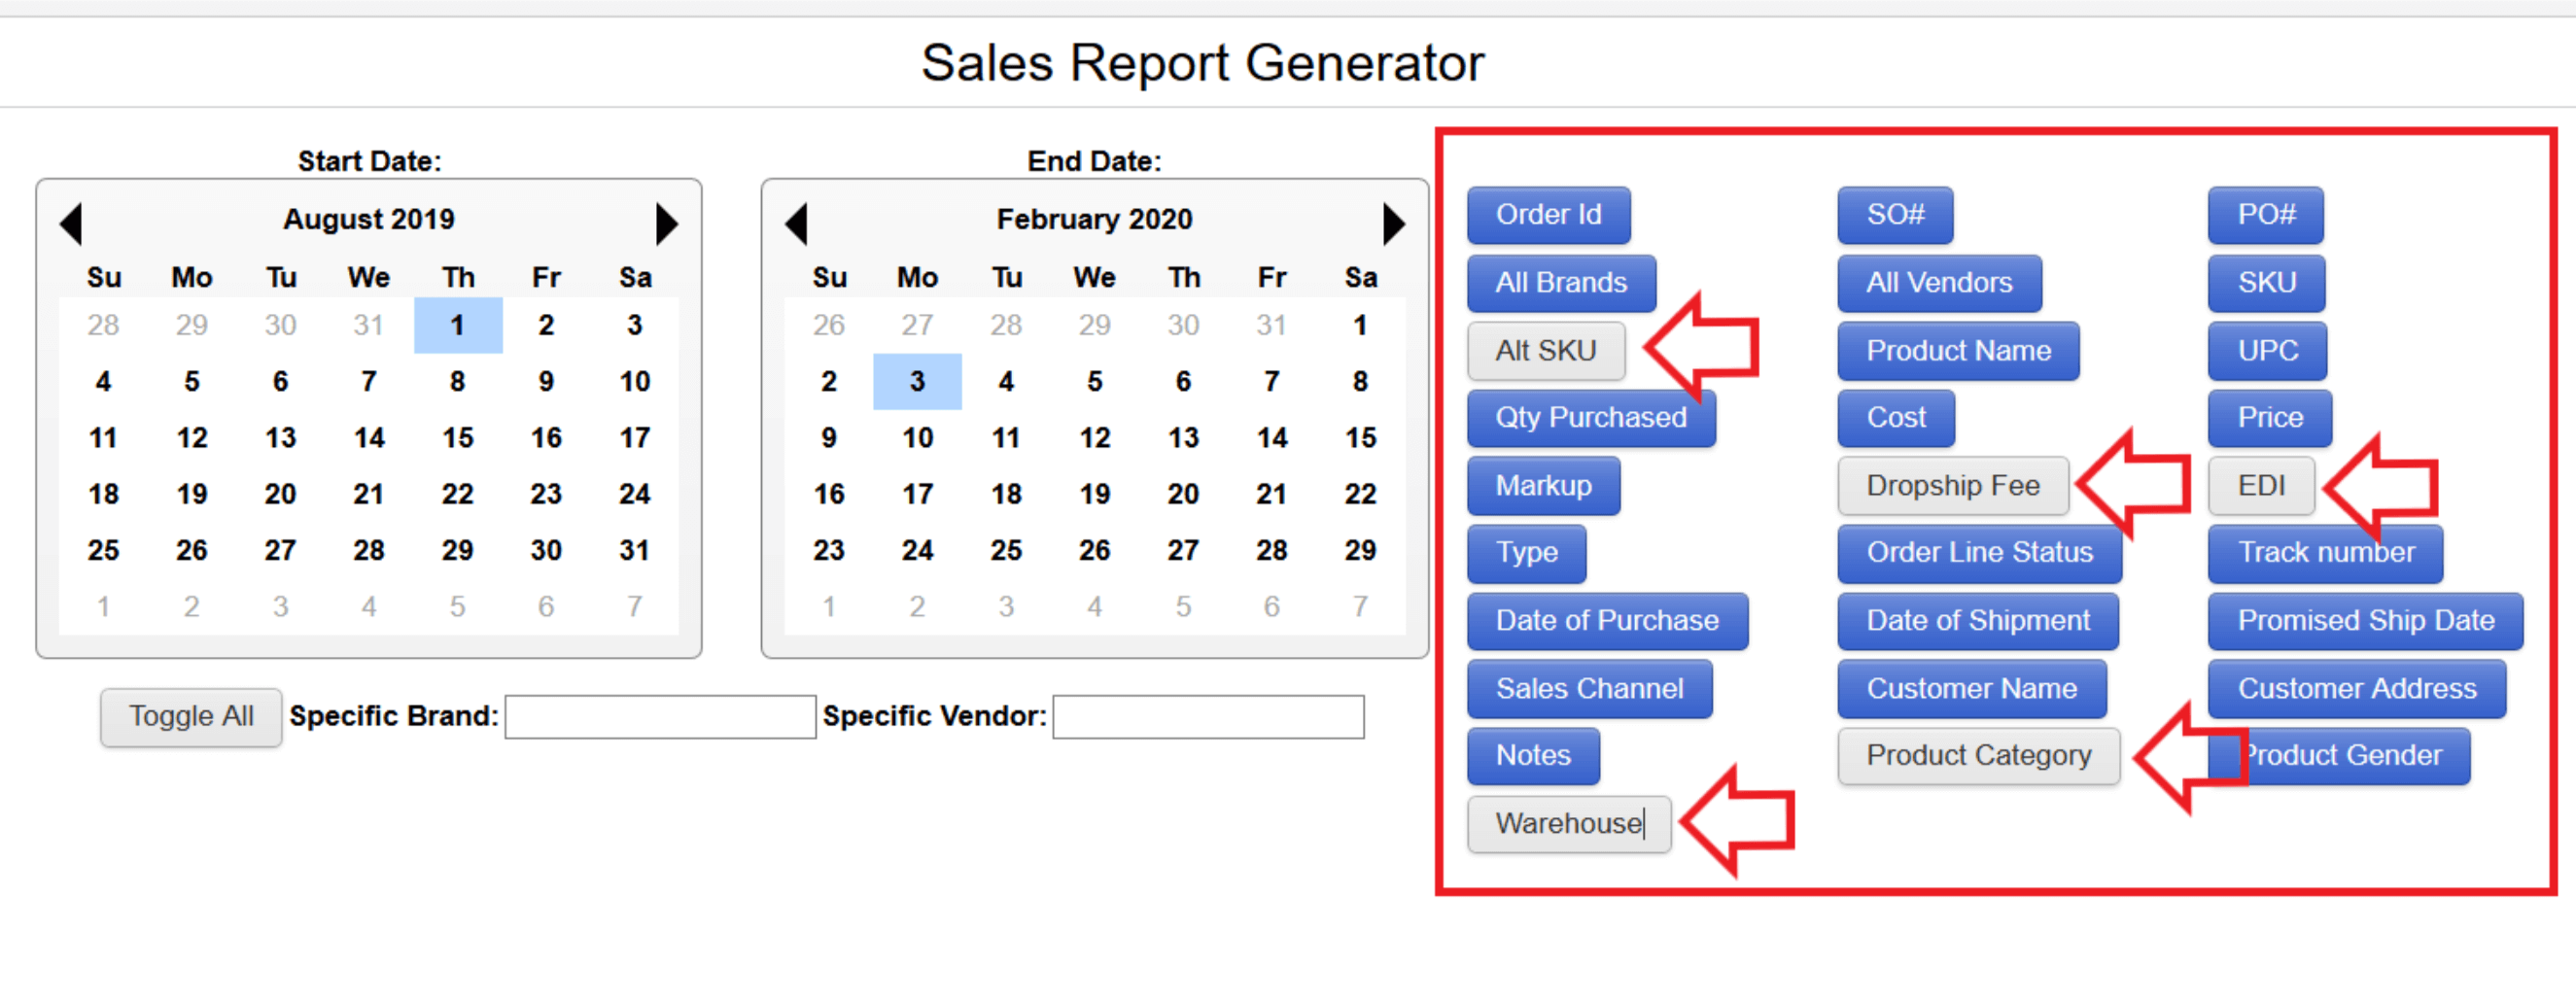
- On the right-hand side of the screen, there are toggle buttons for the fields that can be generated in the report. A blue toggle button means the field will be generated in the report. A gray one means the field will not be generated in the report. The default setting of the toggle buttons will be the last setting that was used. If no fields are selected, no report will be generated. To toggle all fields on/off click on the gray Toggle All button on the bottom left.
- If fewer fields are desired, click on the blue toggle button for each field to remove that respective field from the report to turn it gray and indicate that that information is not needed in the report. In the example below, the user has toggled the fields to be removed from the report: Alt SKU, Warehouse, Dropship Fee, Product Category, and EDI.
- If the sales report is for a specific brand or vendor, simply type this information into the Specific Brand or Specific Vendor fields.
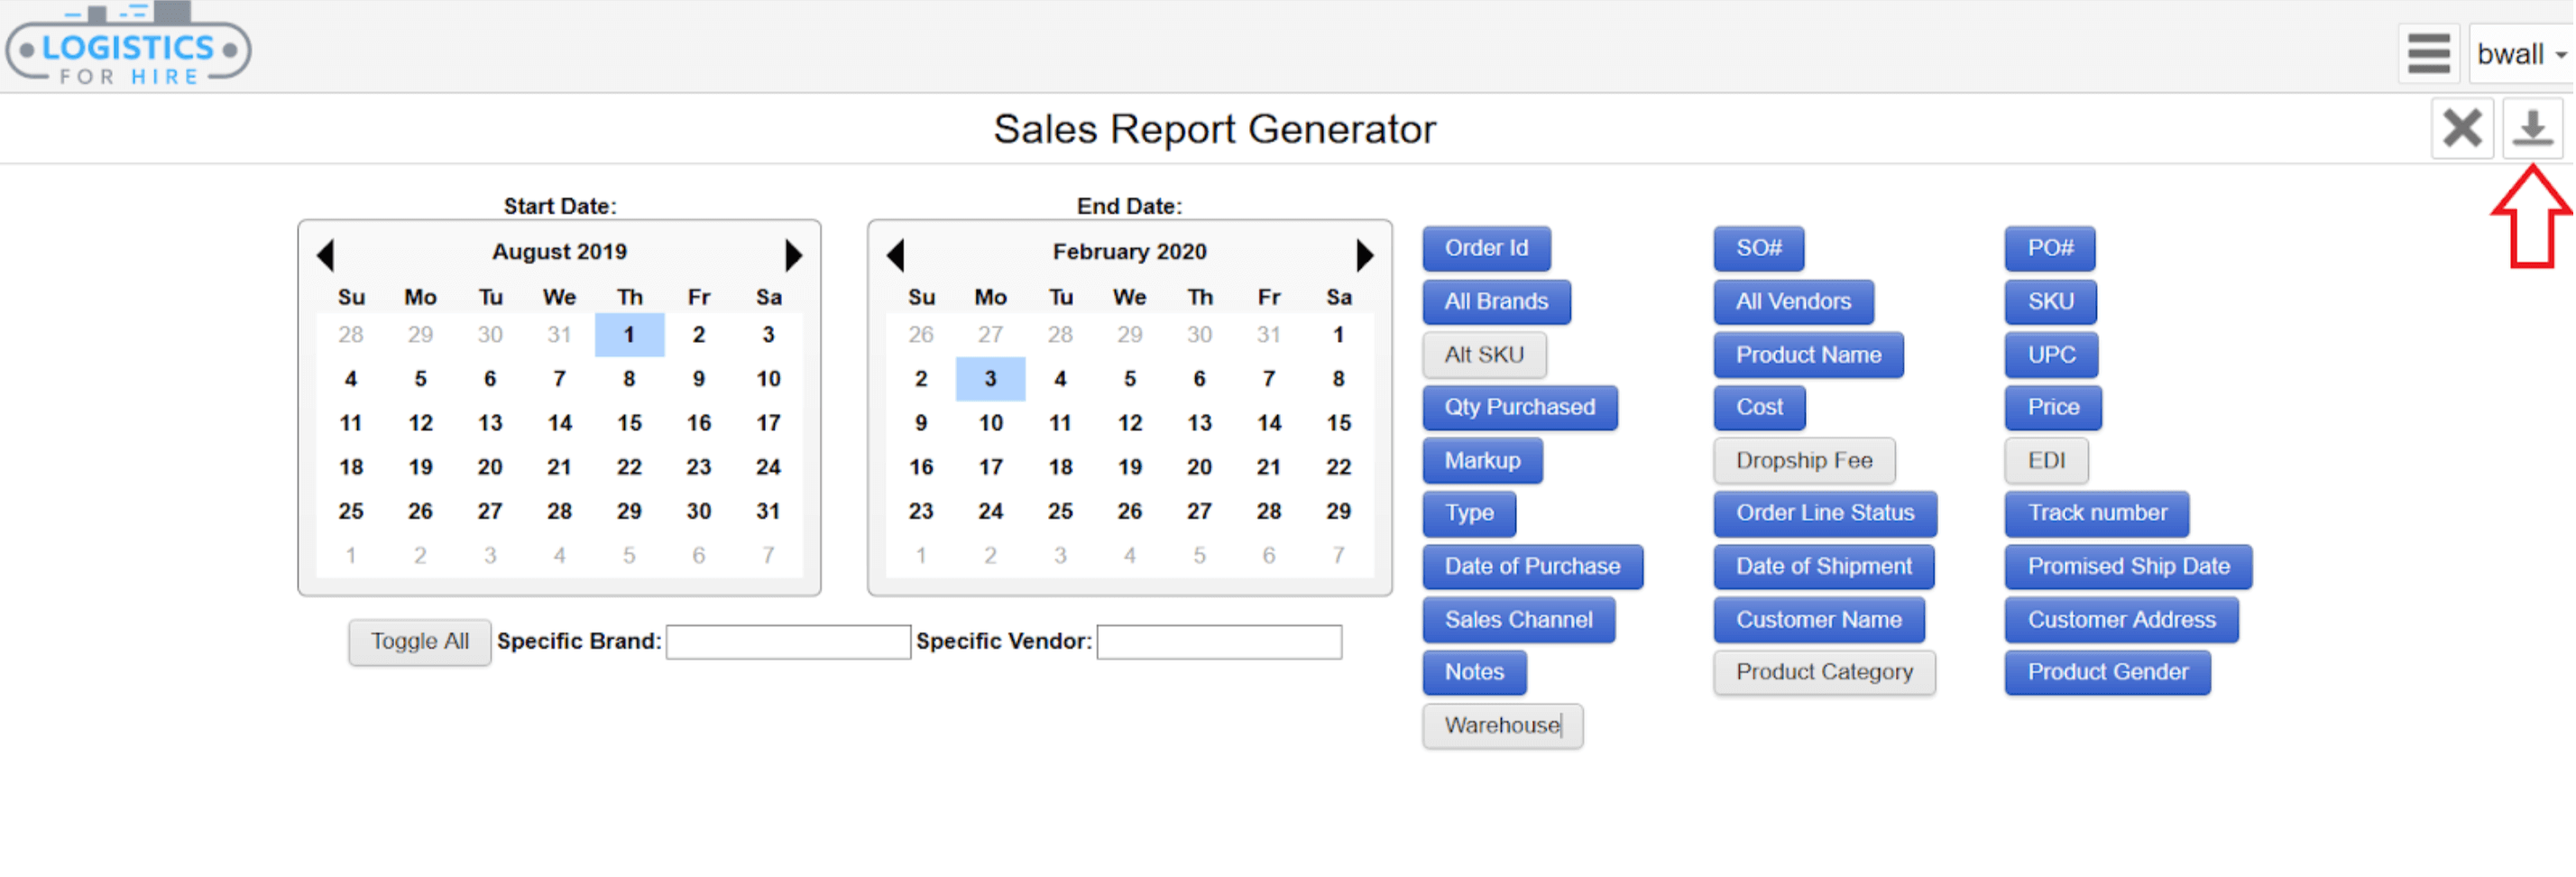
- After all pertinent report details have been entered, click on the gray Download button to generate and download the report as a CSV file.
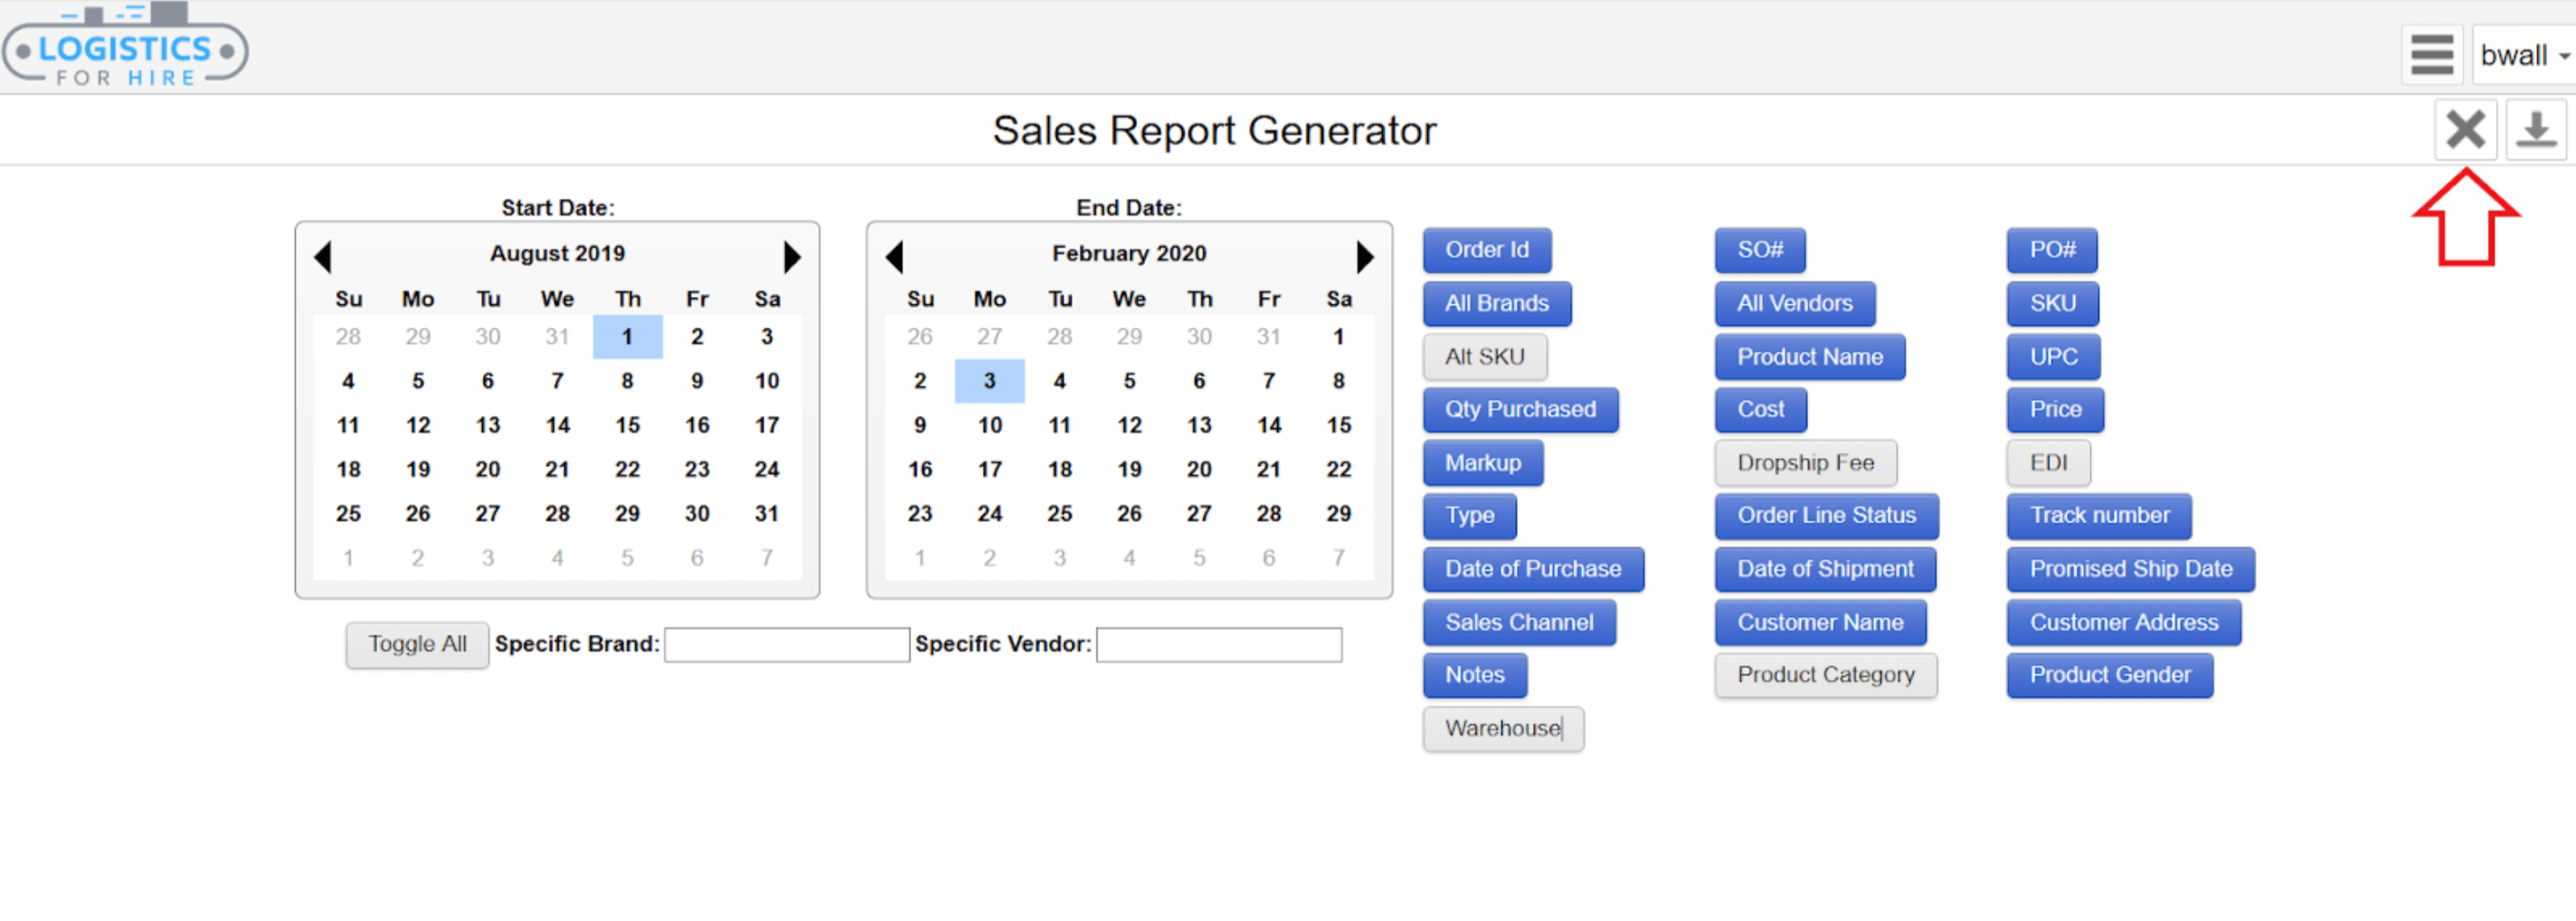
- To clear all report information and start over, simply click on the gray X next to the download button. This will clear all dates and fields on the page.
Special Order Report
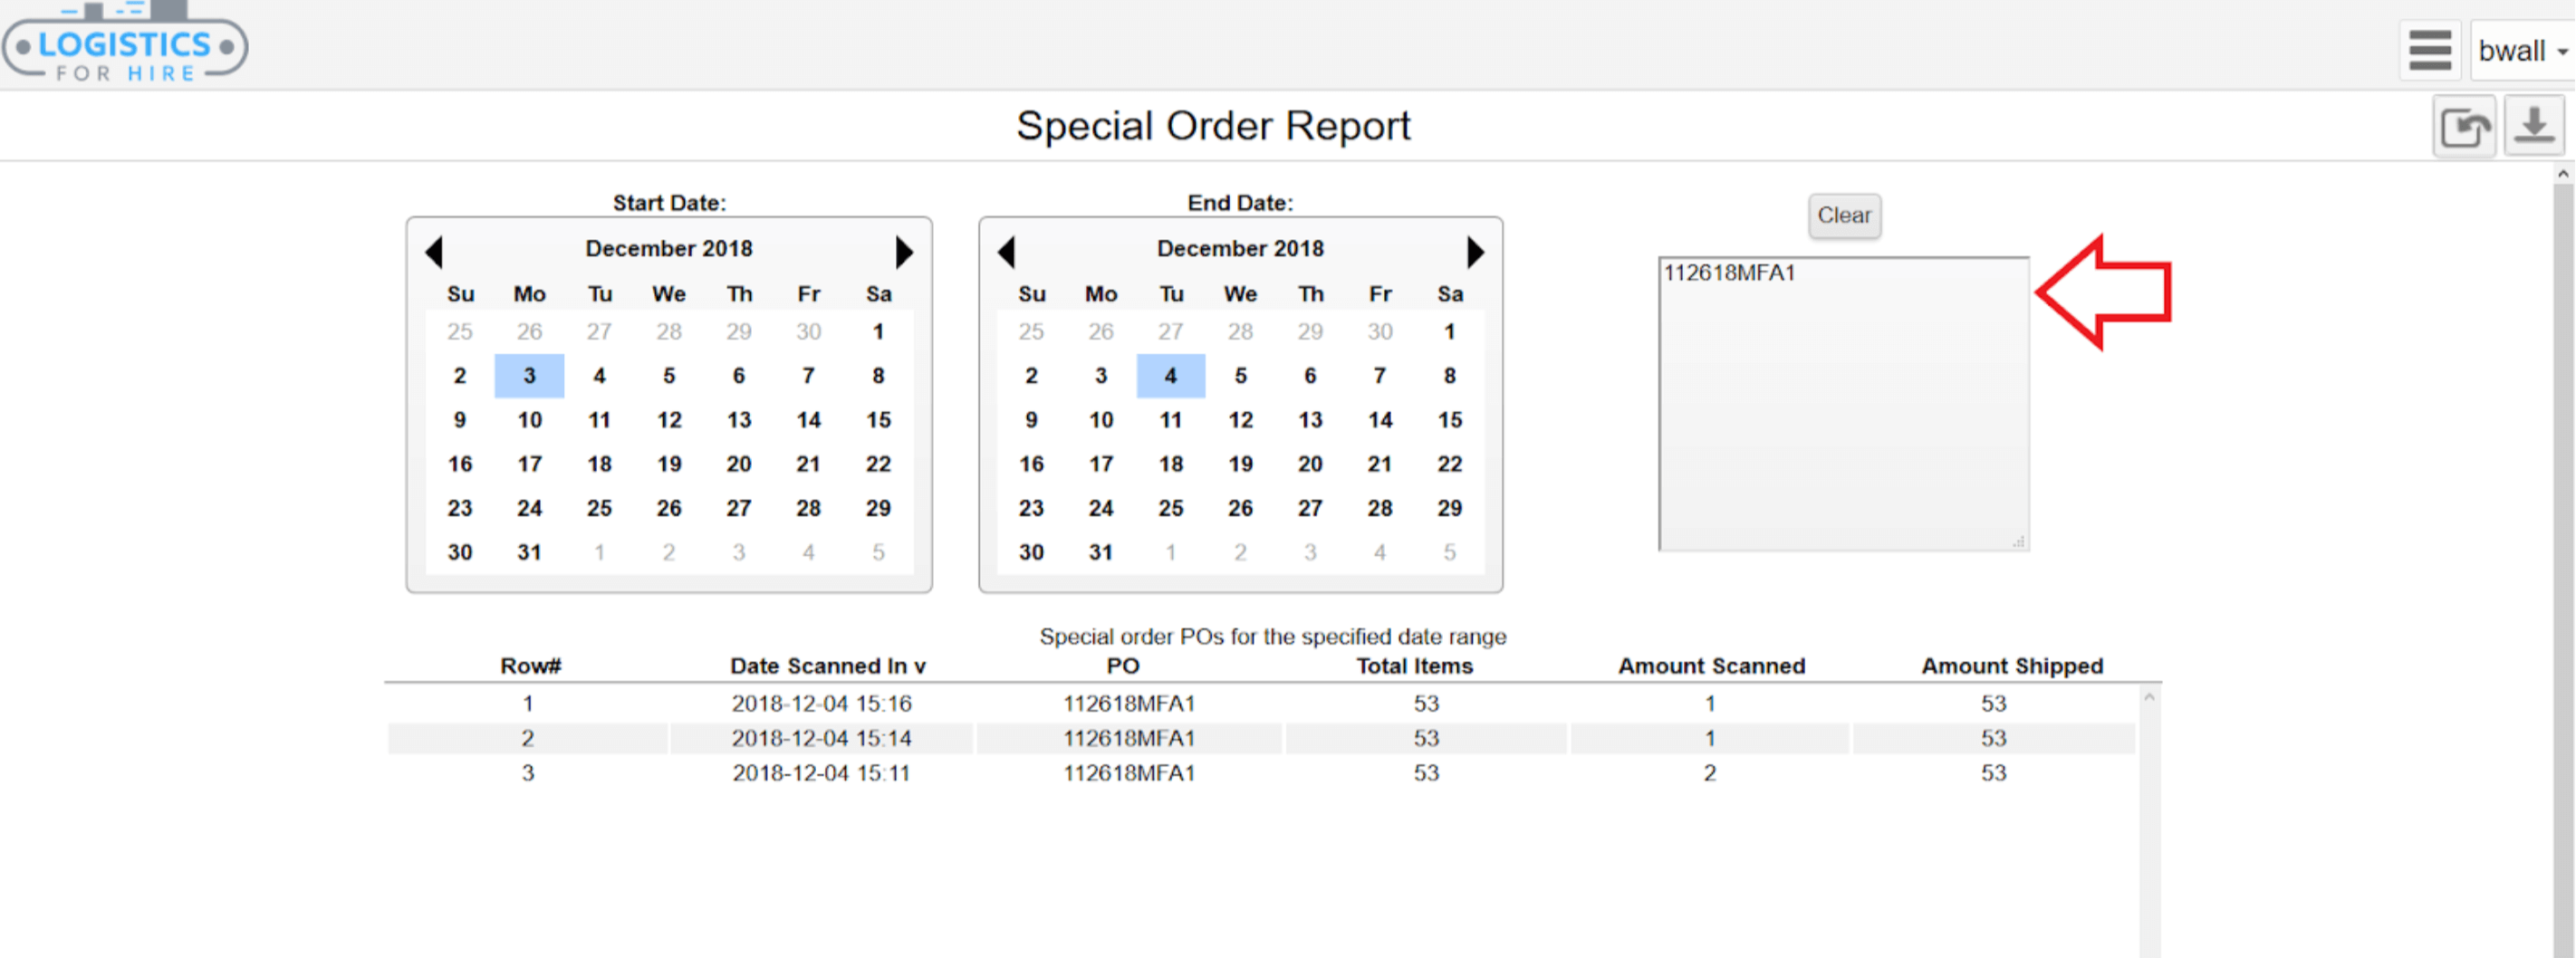
- Select Special Order Report from the CommerceBlitz Tools Menu (three horizontal lines stacked on top of one another).
- The Special Order Report page will open in a new tab. There are two calendars on the page which represent the report “Start Date” and “End Date.”
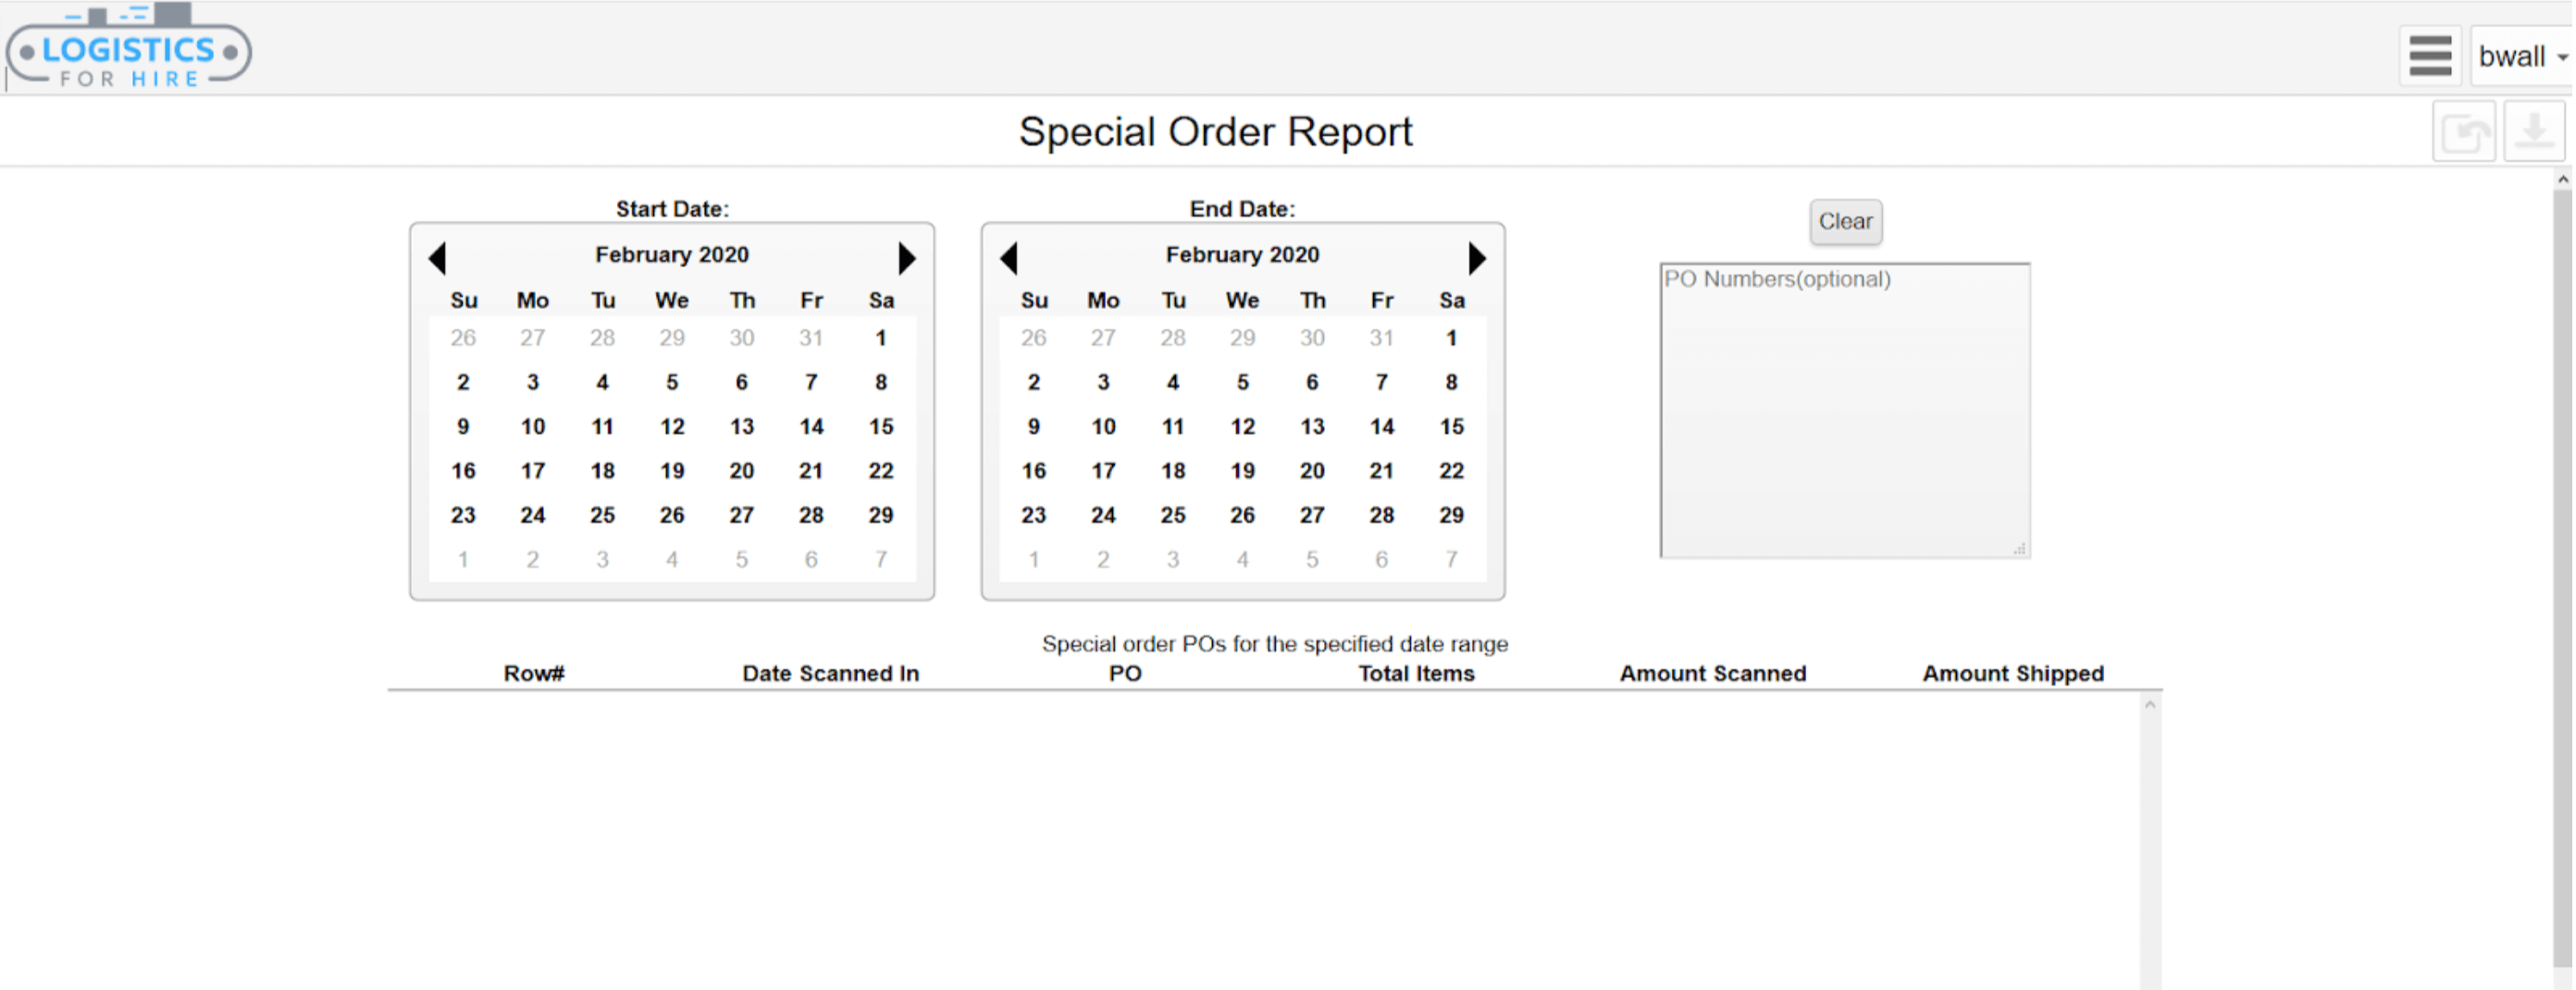
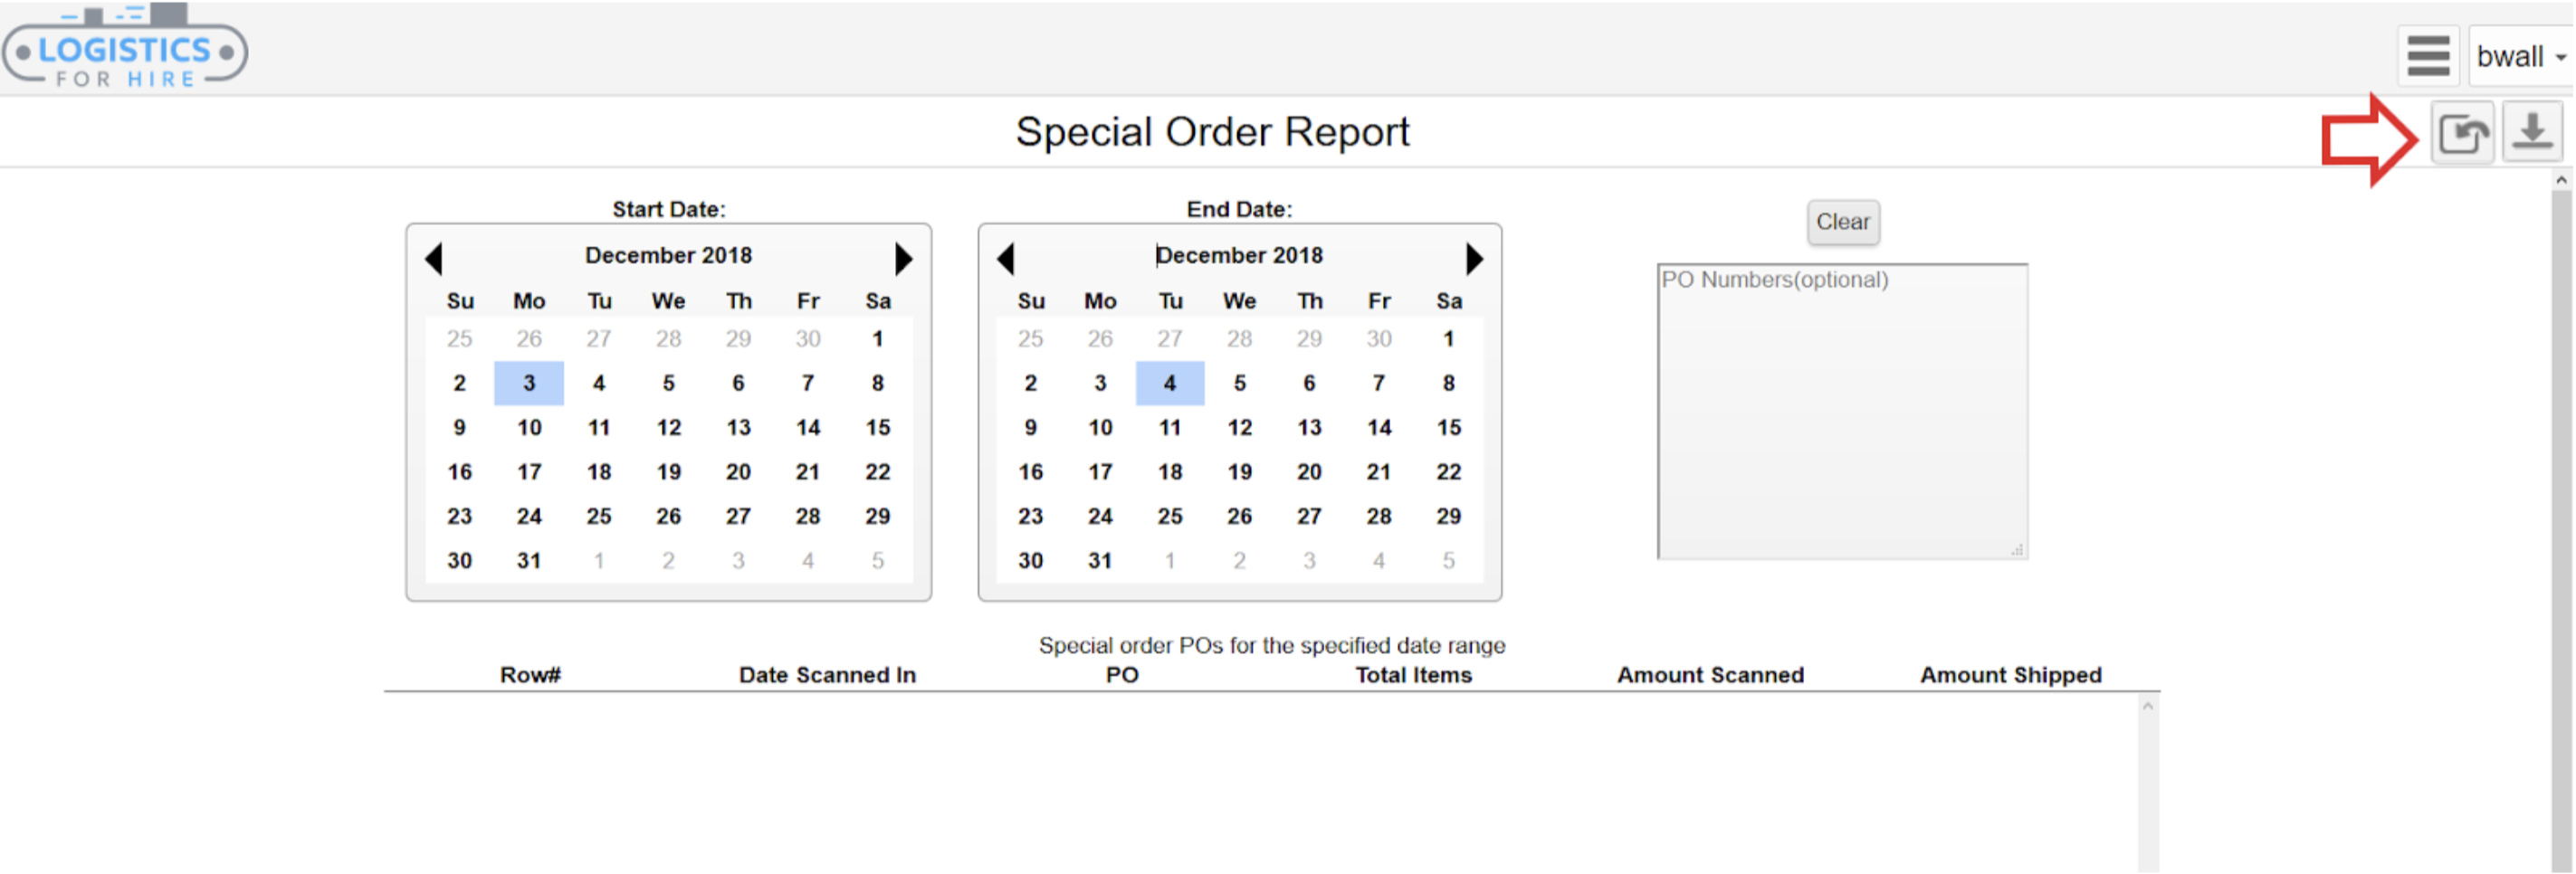
- Select the appropriate start and end dates for the report, using the arrows to change the months. After selecting the date range, click the Load Data button located at the top right of the screen.
- The data for the report will be displayed below the calendars on the page.
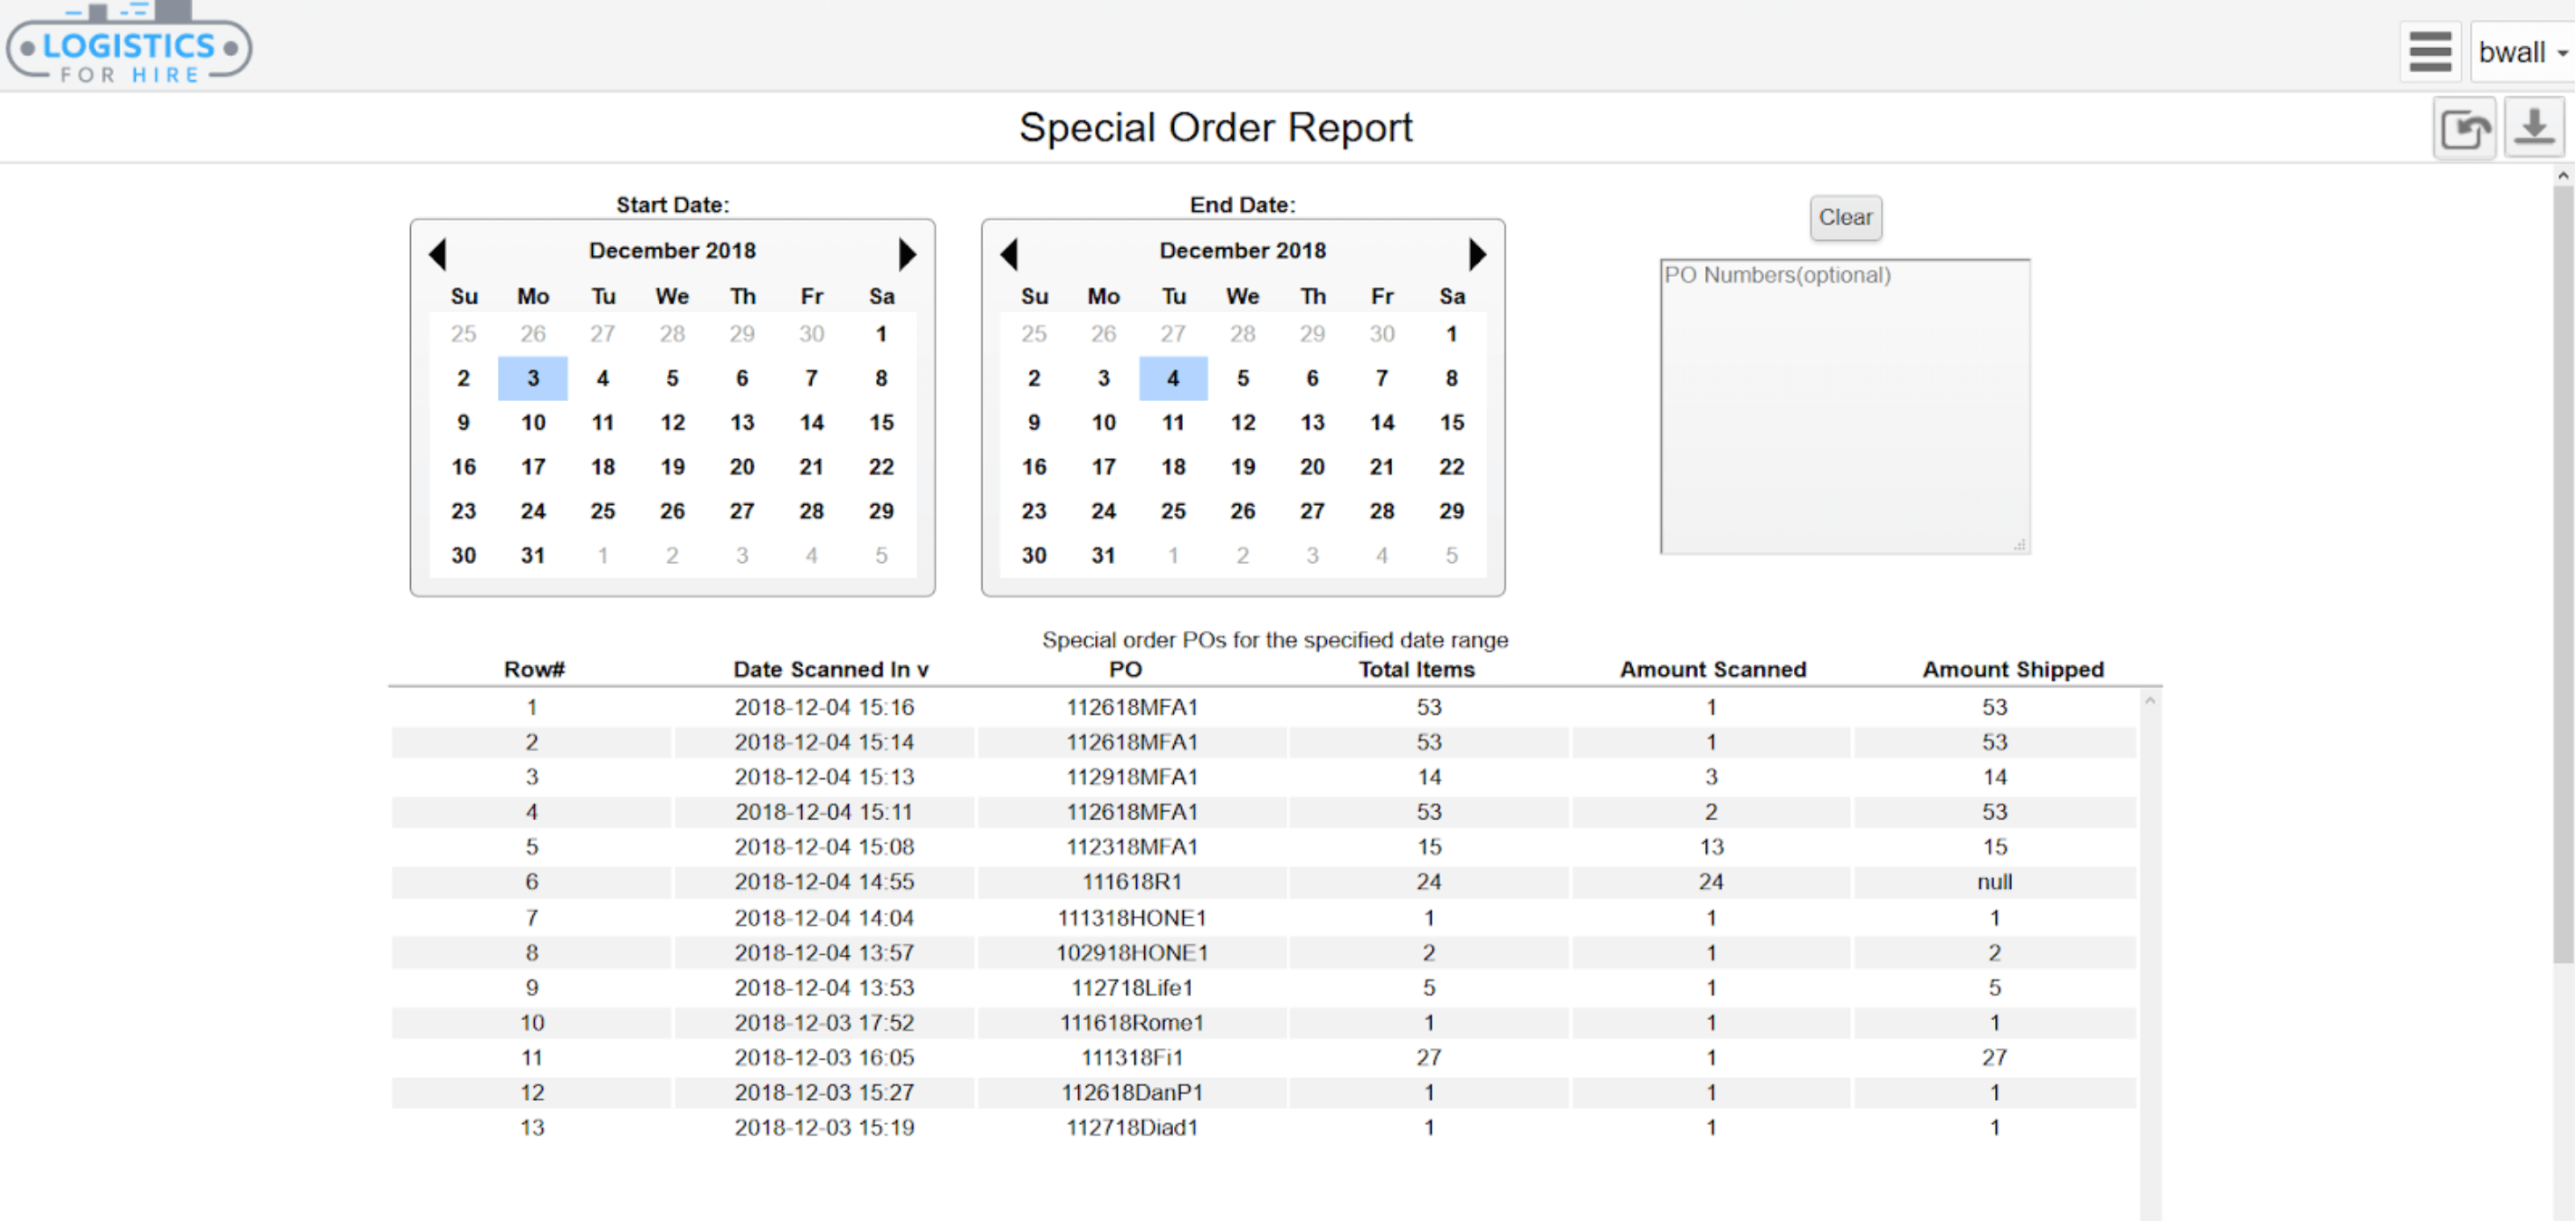
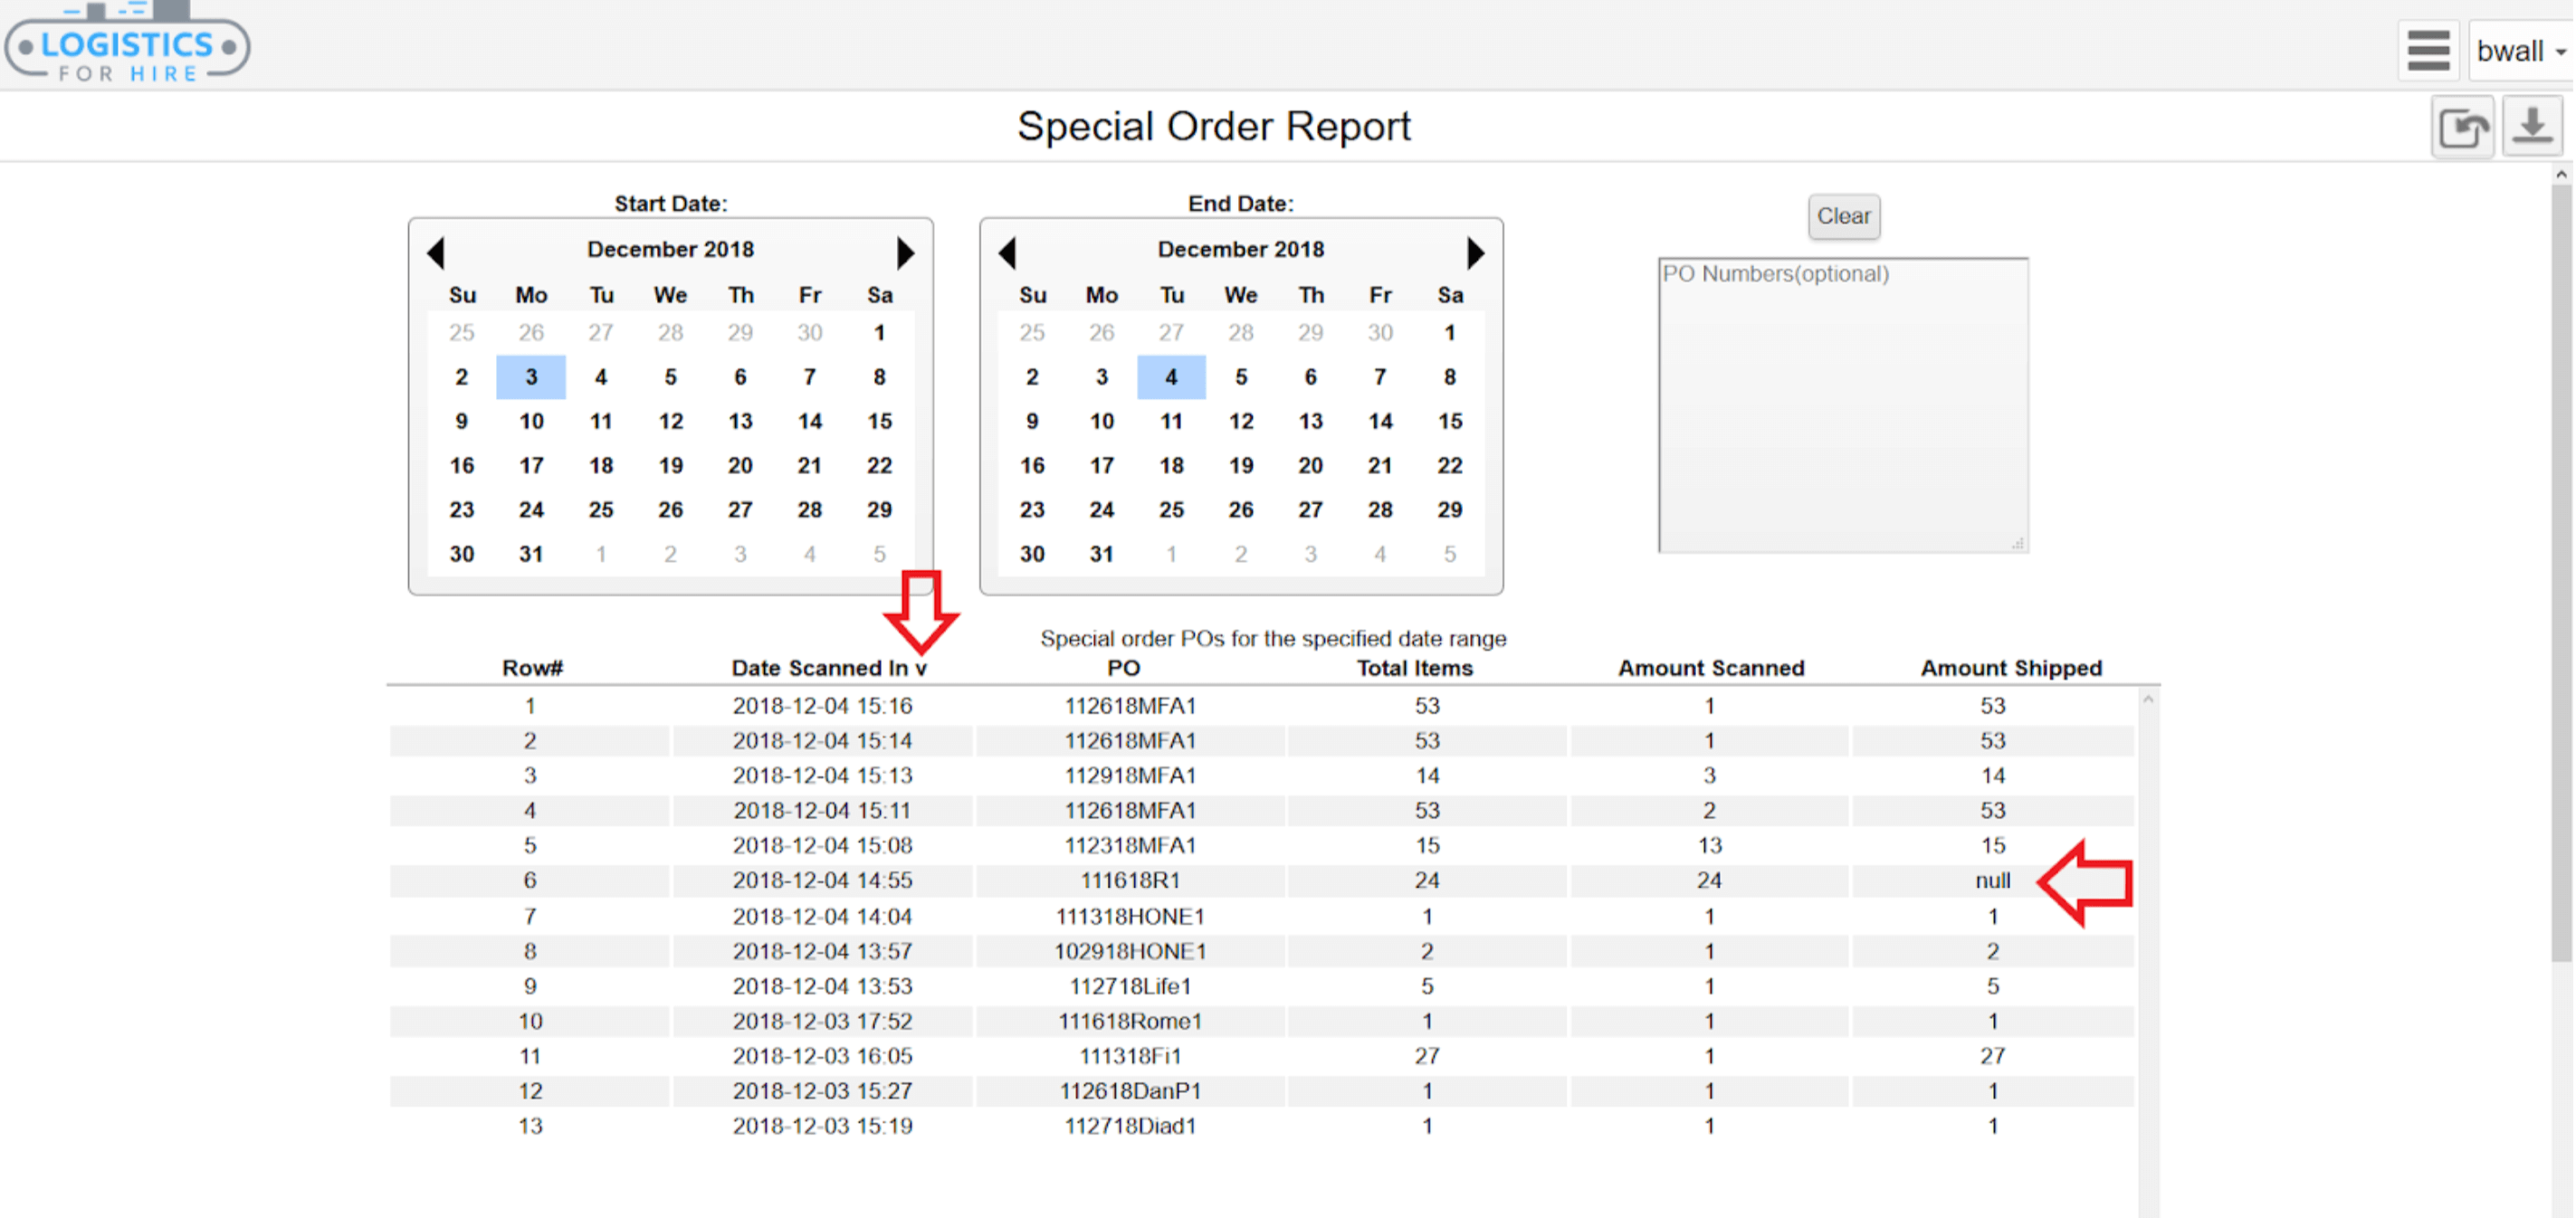
- The data can be sorted in either chronological or reverse chronological order by clicking on the “v” on the “Date Scanned In” column. If no items were shipped from a PO, the column will display “null.”
- The data can be sorted in either chronological or reverse chronological order by clicking on the “v” on the “Date To download the data, click on the Download button located in the top-right of the screen.
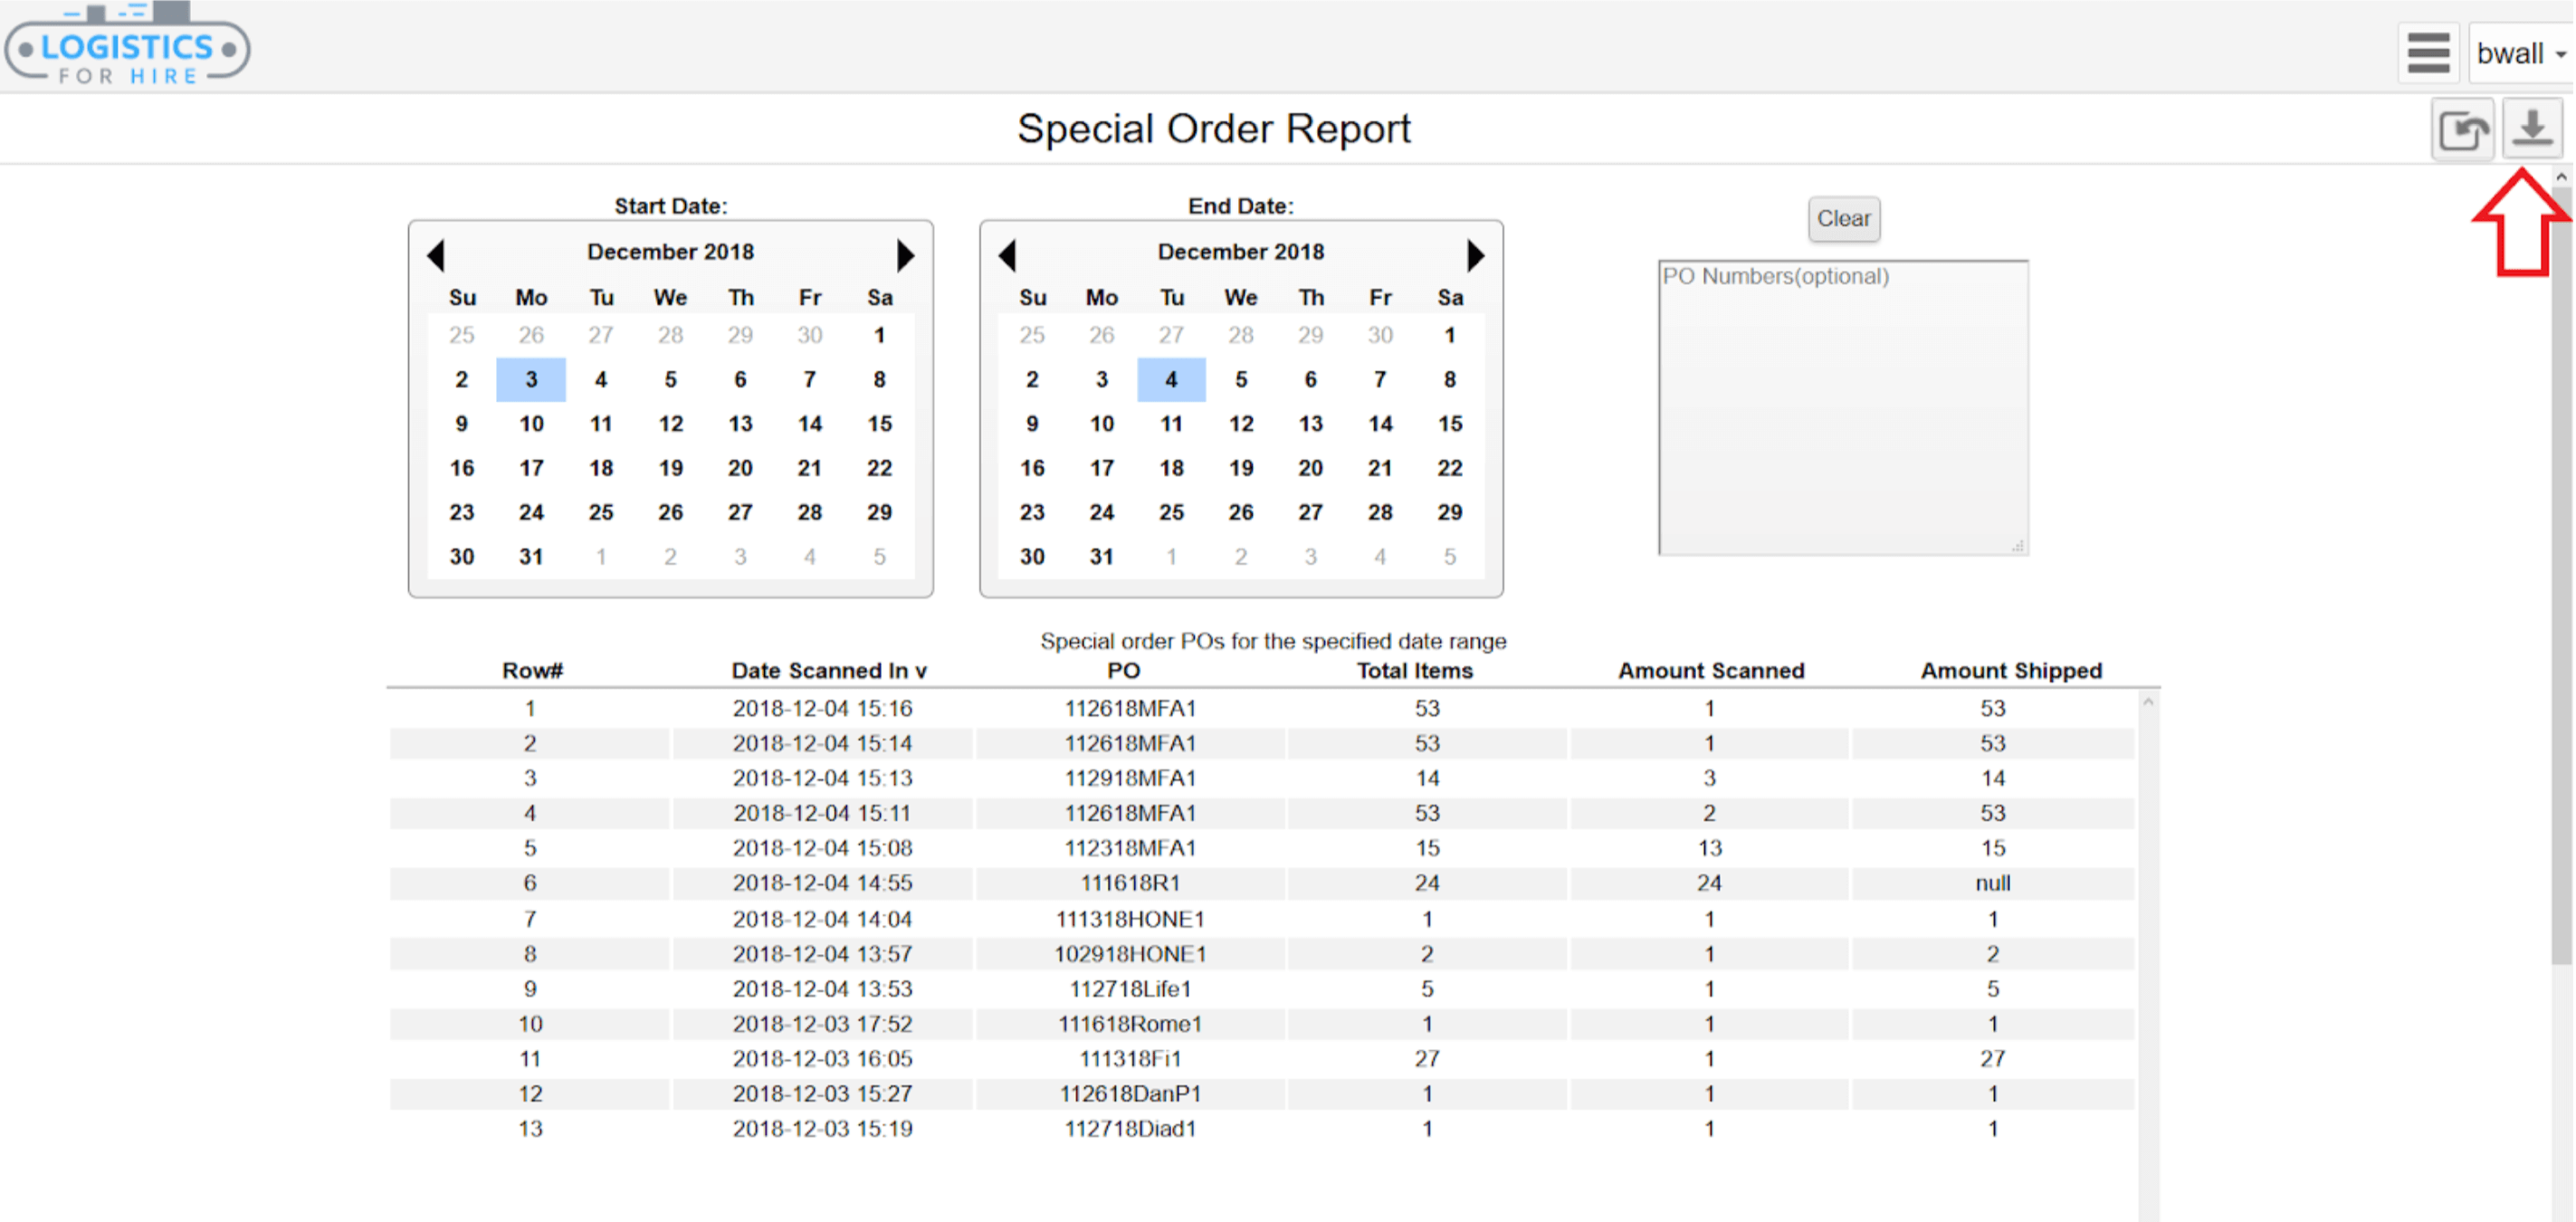
- To search for a specific PO# in a date range, enter the PO into the PO Numbers field and click Load Data.