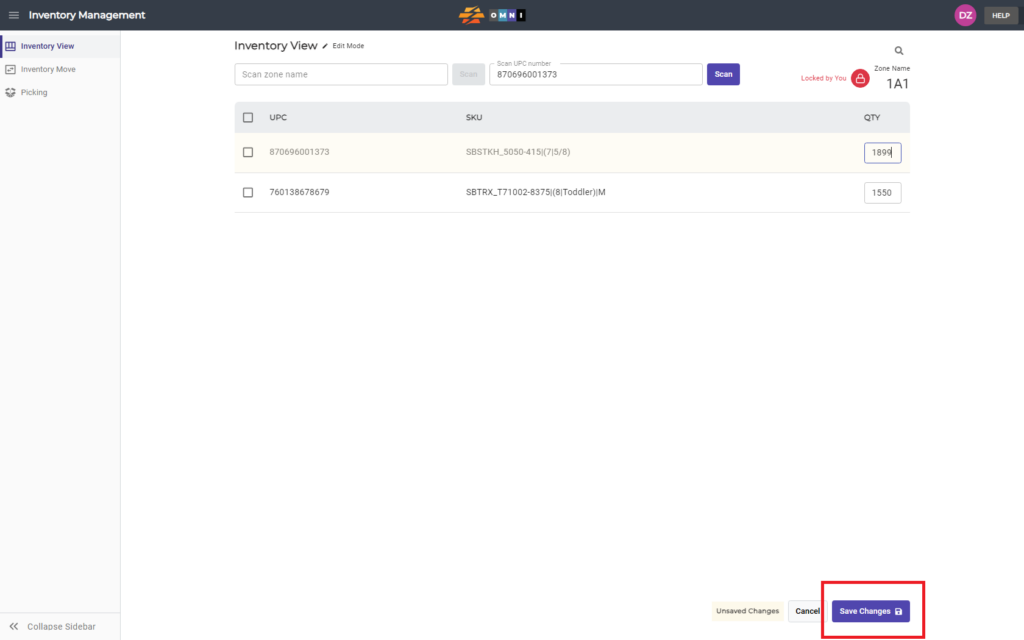
When you have created zones in the warehouse, the next step is to place the products and their quantities in those storage zones. The simple process of scanning products UPC and adjusting qty is demonstrated in this video and photos below.
For any ambiguities or additional questions, please, contact us directly.
A) Main menu
- Go to the main menu.
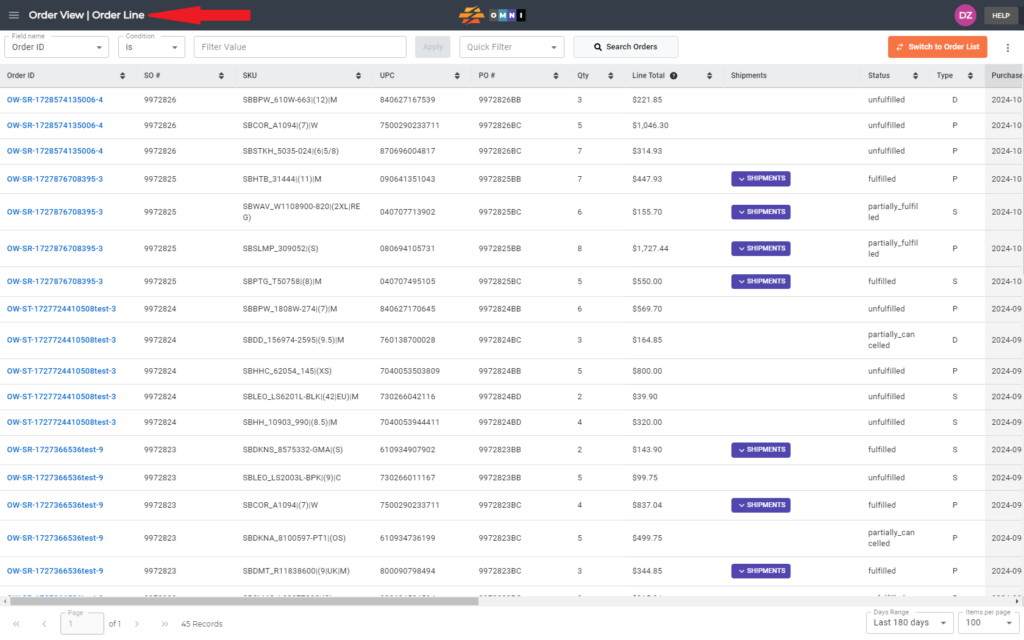
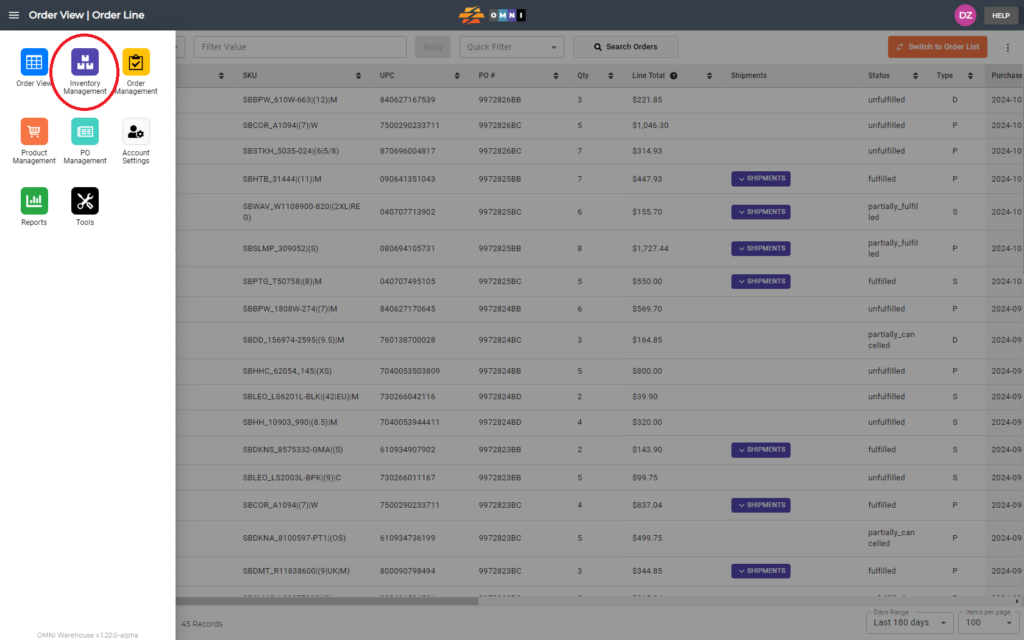
B) Open “Inventory Management”
- Select “Inventory Management”
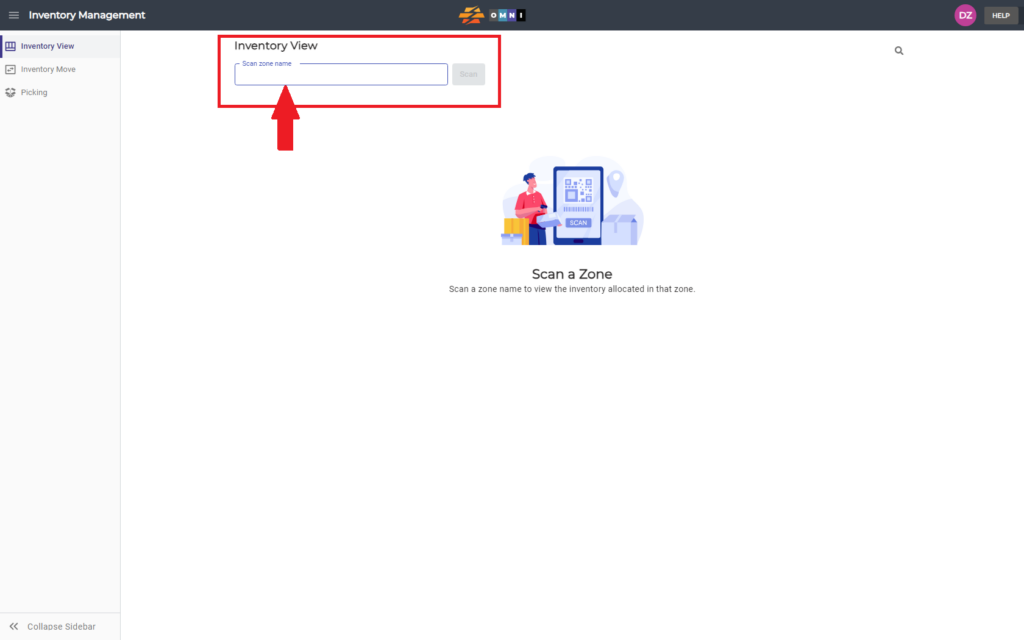
C) Open Inventory Management
- Select “Inventory View” from the submenu
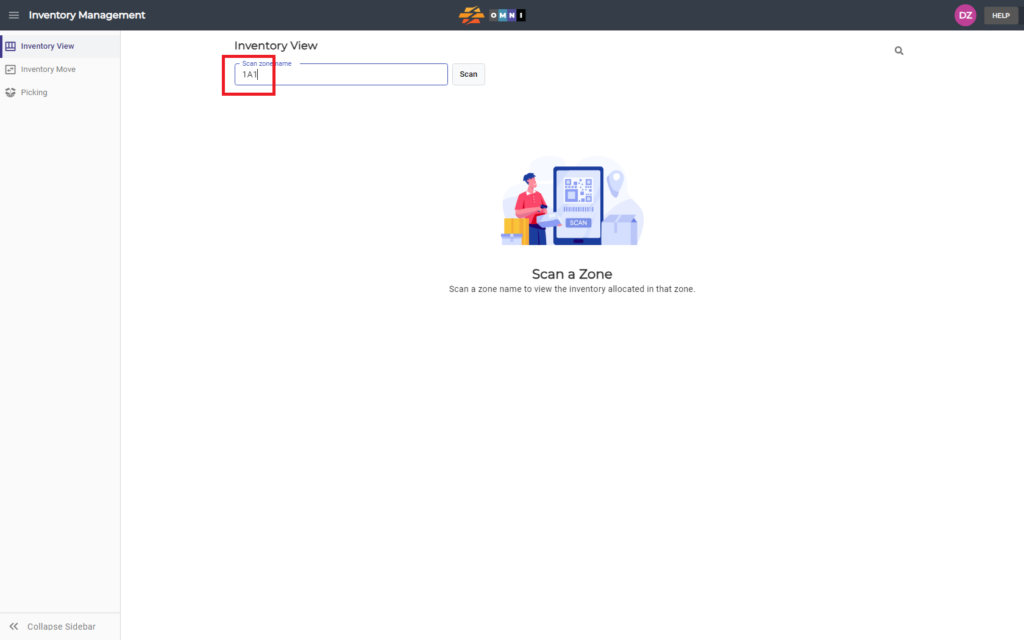
- Enter to “Scan zone name” field
D) Work in View tab
- Type zone name in combination numbers-letters-numbers example: “1A1” or “11AA22”
- Confirm the zone by pressing the “Scan” command button or “Enter” key
- Lock the zone by pressing the green padlock symbol
- When a zone is locked, start scanning product UPC into a field or enter the quantity manually
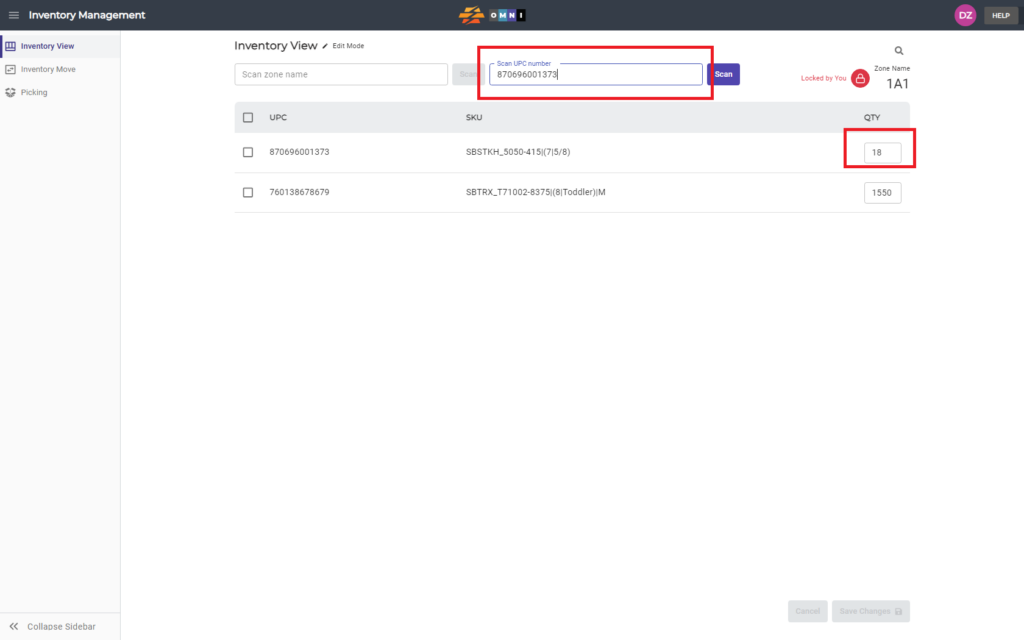
- After entering all planned products in the zone, save the changes by clicking the “Save changes” command button
